"A human being should be able to change a diaper, plan an invasion, butcher a hog, conn a ship, design a building, write a sonnet, balance accounts, build a wall, set a bone, comfort the dying, take orders, give orders, cooperate, act alone, solve equations, analyze a new problem, pitch manure, program a computer, cook a tasty meal, fight efficiently, die gallantly. Specialization is for insects."
-Lazarus Long, Time Enough For Love
Late this evening Lisa and I went out to move the layout stakes into their final positions. We corrected the east/west alignment, then laid out the corners three times until we got it right. I'd made an off-by-one (one foot) error on one of the corners, which messed up everything after it. We worked up a sweat since there was a slight drizzle and the bugs were bad, so we had jackets on.
When we came in, Lisa suggested opening a bottle of wine and having a toast to the new house with the kids + Ben. We visited nicely around the model of the stairs and talked about having a dream come true.
Digging. The digging crew showed up about 8:15. I visited with John about the location of the dig, where we wanted the fill, the drainage trenches, etc. Then they got started and we just watched in amazement.
John started by pushing the smaller of the two ash trees out of the ground. That looked like child's play for his Case track-hoe. He pushed that into the bucket of the CAT dozer that Mike (his partner) was driving. Then he tried the same thing with the larger ash but it wasn't such a pushover. He had to dig around it before it would go. Then he spent several minutes knocking the excess dirt off the roots and trying to either break it in half or just get a hold of it. In the end he just rolled the huge mass into Mike's bucket and off Mike went (picture). As Mike went down the hill the stump rolled out of his bucket and he just pushed it the rest of the way down to the fence.
After the stumps were out, the rest of it was pretty much just dig, dig, dig. They were almost done with the hole when they broke for lunch. By 3:00 they were all done and out of here. John did a nice job digging the drain trenches without having to kill any of the bushes. He hit a big slab of concrete just north of the electrical pole, but it was deep enough not to matter. Probably an old barn foundation. It goes a good 15 feet to the east from there, possibly more.
While John dug, Mike spread a lot of the dirt around the garage embankment and now it looks a whole lot better and will be mowable and everything. He went clear around the back. I think if we'd have realized how much dirt we'd have from this project we would have put the garden further south and had them taper it out even more.
6:30am the dogs started barking when the Caruth crew showed up to start the footings. Wow, we didn't even expect them today, let alone this early. Jason O'Brian was the crew boss. I'd met Jason on the HFH project and was impressed with him. He's part of the reason I went with Caruth. His crew is all Mexican except for one young kid who could be Jason's younger brother or something. Jason just chatters away in Spanish with them. They laid out the foundation by setting the family room wall, then did the opposite wall so it was parallel. I didn't see how they measured out the other walls. He checked it by making sure all the walls were the same length.
Lisa came in to tell me all the crew's batteries were dead and they could not use their little saws. I went out to offer, and Jason accepted, the use of my skill saw. He liked my shop. Later Jason apologized that one of his guys had cut the cord on my saw. They were done setting the forms and such by 9:30 and left to get on to another job. They should be back around 1:00 to pour.
Natalie stopped by to do her 'footing inspection.' We visited for about 20 minutes. She brought along an intern. They wanted to see what the house was going to look like, so we showed them the plans. They really want to see it when it is all done. Natalie really likes dogs and always carries a bag of treats, so we let the dogs out to meet her.
The concrete pump and truck showed up about 11:15 and was done by noon! It literally took them 5 minutes to pour the entire perimeter footing. They had one guy holding up the re-rod, one guy guiding the nozzle, and one guy coming along behind with a trowel. In five minutes they had dumped all the concrete all the way around. It took another five minutes to do the middle footings and that was it. They spent perhaps half an hour troweling it smooth-ish, putting in vertical re-bar, etc. and then they were done. The guy in the pump truck stayed behind to flush out the truck while the rest of the crew went on to another job. Jason said they would probably do three footings today.
Like people have said, Caruth keeps the equipment in really nice shape. Jason told me the pump truck costs about $300K, their first one cost almost $500K. They do only residential work and keep those trucks busy most of the time. Caruth has only been in business five years and Jason has been with them since they started.
At 2:00 another Caruth truck showed up, this time it was a truck delivering the forms. Again, a nice clean, new truck with a heck of a cool boom lift on the back. They have a nifty little "hook" device for picking up bundles of forms just about the size of a telephone booth. It's all a one man job to pick them and put them in the hole. It is clear Caruth believes in investing in first rate equipment, taking good care of it, and using it fully. The driver of the forms truck said the wall crew should be in around 9:00 tomorrow.
I also called Munn to find out what happened to my quote. They're still working on it. Larry said he was going to be out of the office tomorrow so it wouldn't be until Thursday at the earliest. John advised me to be a squeaky wheel with the lumber yards.
The foundation walls were poured today. Another amazing show put on by Caruth. Scott ("The Bald Guy") led a crew of about 10 guys who set up the forms for the walls and poured the concrete in. They started around 8:45 and were finished at 1:15. The shape presented some challenge as squaring it up involved a game of 'push one wall, move another.' Scott made sure it was good and square-he complained when it was out 1/4 inch. I checked the length of a couple of the walls and they were right at 16 feet. We had a discussion about the placement of the re-rod. John had said is should be 1 ½ from the inside edge, Scott said it needed to be in the middle. I think John's reasoning sounds better, but I could see how the form system worked and the re-rod wasn't going to stay anywhere but in the middle. Given the relatively short length of our walls, I'm sure we'll never have any trouble anyhow.
There was some trouble getting the forms straight as some of the re-rod that had been set in the footing was out of line. They had to lift the form a little and cut the re-rod. Again, with the keyway in the footing and the remaining re-rod I don't think we'll ever have a problem. Some day I should probably learn a whole lot more about concrete, but for now I'll have to be content to try to referee between the various experts.
A couple of the guys on the crew thought the house was really cool and wanted to see it when it was done. Scott wanted to get a picture of the foundation but couldn't get a good shot from the ground so he had Bill (the pump operator) give him a ride up on the boom of the pump so he could take an overhead shot. I hope we get a copy!
I just called Mike at Beisser to see what happened to their bid. Same story as Munn. Interestingly, Beisser doesn't do all the upfront work to figure the flooring system as part of the bid, they wait until you select them.
The foundation crew showed up to remove the forms at ten till six and were gone by about 7:00. We discovered that the insert we'd put in to leave a hole for the sewer had collapsed part way. We will have to chisel that out. I'd asked Scott if he thought the plastic sleeve I had was strong enough or if I should build a wooden box. He said it would be o.k. Oops. Otherwise the walls came out just perfectly.
Sonny showed up late in the day for a quick site check before doing the floor. He said he didn't think there was any way they could pour Friday, but he'd be ready to go first thing Monday morning. We offered to spread the rock around for him so he could pour right away. He told me he didn't want to pour the floor in the middle of the day as it just cured too fast and would crack more.
A load of rock arrived for under the floor as we were eating breakfast. I made calls to various folks trying to finalize things. Still no quote from either lumber yard-- this is getting annoying. They've both had it for over two weeks and they both promised four or five days.
Lisa and Mike spent some time today moving rock down into the basement. It was very hard going. They tried several chute arrangements but nothing worked out very well. They sure tried hard though. Late in the day I went out and with Mike built an improved, wider chute that the tractor can dump into and then down into a wheelbarrow. This worked pretty well and in a short amount of time we were able to move quite a lot of rock. We quit on account of darkness.
Using the new chute we were able to get all the rock moved into the basement and spread around in two or three hours this morning. Check out the pictures. I'm afraid I don't remember what else we did Saturday (I'm writing this Tuesday).
Mike and Lisa started the day moving dirt with the tractor to fill in the trench down the middle of our property. They got all that done while I went off shopping at Lowes for a bunch of things we needed. When I got home I took over for Mike on the tractor and continued to bring dirt over to Lisa to rake out in various low spots. We made good progress and sure gave the old Ford a workout.
The floor was poured today. I didn't supervise much as the guys seemed to know what they were doing and it wasn't that interesting to watch (you know the saying--it's like watching cement set?). It looks good and will be ready to build on tomorrow.
Got word mid-morning from Larry at Munn that their quote was ready. I went over at lunch to see him. It is interesting to see all the things they think of that you'll need. The total amount wasn't out of line with what I'd been planning, so that was good. I called Mike at Beisser and he came out at 3:30 with his quote. I didn't spend a lot of time with him, but I did go over several line items to compare specific prices (it's almost impossible to compare the grand total since they each assume different quantities of things like studs). Price wise, Munn and Beisser were pretty comparable. Munn being local seems like the better route, so I gave them the nod.
The panels arrived this morning, in the rain. We're now two for two on unloading in the rain. The driver called to say he'd had a flat last night and had to stay over somewhere so he'd be about an hour late. When he arrived we got right to work unloading the panels onto pallets. We used the newly modified fork lift on the loader to pick up four panels at once and move them. Our unloading crew was Ben, my dad, Mike, Lisa, and me. We got the truck unloaded in about an hour and didn't drop any panels. It sprinkled a little but nothing bad. Everything was in good order and accounted for. There are no two panels alike in our order.
While the panel truck was still there, the Munn truck showed up. I was expecting them to miss each other, but Munn was early. He had to just wait his turn, which he did happily. He was bringing lumber for the basement and some stuff for the first floor deck, though not everything. He didn't have a fork and just tilted his truck bed to slide it off. That didn't work so well as the strapping broke on one big bundle of 4 x 8 sheets, but nothing was damaged.
Dad ran a couple of errands to get things. Mike and I got the sill plates on, then started in on framing the basement walls. Mike and Dad worked on getting a repeatable set up going on the radial arm saw but had continuous difficulty maintaining consistent length. They still aren't sure what was slipping. Just the same, they were able to keep ahead of me putting together the walls (though just barely). If they'd had their system really cranking they'd have been pushing me.
We got the four main basement walls framed up without too much trouble. Ben and Dad hung around all day helping where they could. We worked a bit after supper to actually set the walls and clean up. It was a good way to wrap up a good day's effort. Tomorrow comes early for another busy day.
We got out and were ready for an early start, but the lumber didn't show up until almost noon. We put the time to good use by organizing the panels for the first floor walls so they'd be ready to go when the time came (the panels aren't loaded onto the truck in any particular order).
Once the lumber for the first floor did arrive, we got right to work setting the rim board around the edge. That turned out to be a lot trickier than we'd expected because we had a lot of fussing around getting the octagon 'square.' In retrospect we can see several ways we might have improved on our process. Oh well, next time I build an octagon I'll know better.
Finally got into something of a rhythm today with setting floor trusses. Still kind of slow going and we made a few mistakes along the way that slowed us down. Our first 'octant' went very smoothly, but then on the west side I forgot about the overhang for the fireplace and we had to pull out five joists we'd just put in. Doh!
Back on track we kept plugging away with one joist after another until we had all the 'straight' ones done by supper time. After supper we cut three special length ones that we'd put off until others were in place but ran out of steam about 8:00pm. Dad also needed a hand getting the boat onto the trailer before they took off for the lake.
Joist setting isn't too bad a job once you know what you're doing. On a rectangular house it would be a piece of cake compared to all the funny layout we had to do on the octagon. We had some pauses to consider how the three plans we had (architects, panels, and floor system) compared. When you order a floor system using I-joists, you get a computer generated floor layout that shows you where every joist is supposed to go, and you get joists of the appropriate rough length. You don't really have a lot of room to change it, and I'm sure the joist manufactures don't want you to change it. However, the joist layout around the stairs on our plan was just plain crazy. So we did some on-site engineering and found a more sensible way to do it. It worked out much better in the end.
The excavators didn't show up today to back-fill like the said they would. If they're not here tomorrow I'm going to be upset. It's a lot harder to be doing this floor work when you have to jump over a three foot ditch and climb on ladders to get to the foundation wall.
We also put the styrofoam around the foundation. You'll notice this is not the typical 'blue board.' I did some research and found out that the practice of using Dow's XPS product came as a result of a heavy PR campaign by Dow to discredit the much cheaper EPS (white 'bead board'). A study by the Canadian National Research Council found that EPS performs just as well, although with a slightly lower R-value, even after getting wet and being in the ground. Dow's research was based on a very contrived situation where EPS was immersed in water under concrete. So I decided to use EPS for my application, especially since with the porch all the way around the ground around the house will stay rather dry, I think.
Mike and I had just started to get the LVLs (the big beams) set when the back-fillers showed up (half a day late). So we took the morning 'off' to watch the big machines do their stuff. John from Ames Trenching again showed what a wizard of heavy equipment he is. We did have to scramble because after the first load of dirt went into the hole the plastic we had around the foundation started to tear away. I quickly ripped a bunch of 1 inch strips of OSB and we tacked it around to provide a better grip. As it worked out, that did hold up John because he had to wait for the rock to arrive anyhow. Our driveway in front of the garage has mostly been obliterated now, but that was kind of inevitable.
In the afternoon we made a good run at finishing off the floor joists. Still didn't quite make it, but darned close. All we had left to finish was about a dozen odd ones that we wanted to hold off until we found out how many I-joists we had left.
There are definitely some things I would do differently on this job, first among them is to get a laser square. That would have made layout much easier and more accurate. As it was we did a lot of measuring 'just to make sure.' This octagon shape of ours also made life more difficult because (a) there are many different length joists, and (b) unless the perimeter is exactly an octagon, there's a little slack to be made up here and there. I think we did a darned good job getting the shape right, but just so, there was an error and over 16 feet it adds up.
It felt like a hard day by the time we were done and I was a little discouraged that we hadn't made more progress.
What a difference a day can make. We had a nice breakfast this morning with all four of us at the table for a change. I've been having some A-fib attacks this last week, so I went back on my Rythmol and that seems to have helped a lot. Everybody worked well as a team today and we got all the odd joists in pretty quickly with plenty of material to spare.
After lunch, Tigon and Mike teamed up to put in all the rim board that needed to go around the stairs. I cut pieces for them, handed them down, and supervised from a distance. They did a really great job of working together, were cheerful and reasonably quick. They both said they enjoyed working together. Tigon got to learn to use the nail gun. They made up a new verb -- 'to max' meaning to apply the Fat Max tape measure.
We got started on putting the decking on, and found that it goes pretty quickly. We got several sheets on before dinner, then after dinner I ran to Lowes to get some hardware for the compressor and when I got back Mike and Tigon had finished off the row of decking we were on and finished another. Pretty quick work for under an hour.
The stuff I got for the compressor will let us run both the framing nailer and the caulk gun at the same time. This will allow for a more efficient division of labor that should keep all four of us busy. That has been one of the biggest problems I've had managing this project -- keeping everybody busy. I don't know all the jobs well enough to dole them out ahead of time and still have to do a fair bit of head scratching. Putting down the decking is a wonderfully repetitive job that we can apply all hands to. I know that setting the wall panels will be much the same (since I've done that job before). I thought about getting Dad's compressor, but realized that I'd have to come up with another electrical supply as two compressors running at once would surely blow a 15 amp circuit.
Lisa put in some time tonight mowing on the lawn tractor (since the big tractor has the loader on it). That's a thankless job -- and I thank her for doing it.
At the end of the day I climbed up on the deck and walked around, looking at the views we'll have when the house is done. It sure will be neat. We'd stood in the same places dozens of times before, but now I was also at the right elevation. What a difference that makes. The view from the kitchen will be very nice. We're high enough up to have a feeling of a commanding view to the south. I can't wait until we get to the cupola!
The four of us got a good start on the morning again with a nice breakfast. We started right in at putting on the rest of the decking for the first floor. It went very smoothly and we made steady progress all morning long. With two hoses on the compressor we were able to run the caulking gun and nailer at the same time which made for a good synchronized bit of team work. While Mike nailed off a piece of decking, Tigon would lay down the next batch of glue and Lisa and I fetched up the wood. I feel good that we didn't have much waste considering the odd shape. A lot more triangles than you expect on a normal house, but still not bad.
By mid-afternoon we were finishing up the left over parts around the stairs. As some dark clouds rolled in, we hauled up the first two walls worth of panels with an eye toward setting our first walls. But then it started to rain and we decided to call it an early day at around 4:30. After nearly a week of long days it felt good to just relax for a few hours.
Before packing it in for the day Lisa and I climbed down the ladder into the basement for the first time since putting on the decking. This was really our first chance to see the whole three dimensional space since we were in the original house in Mumford. As the project has progressed, we've all commented on how our perception of the size of the house has changed, sometimes bigger, sometimes smaller. Down in the basement it seemed just about right.
It was really a lot of fun to have both kids working today. Times like these make me very proud of my children. They work well together, laugh, are reasonably competent and smart about what they do, and they work hard.
We started putting up panels today and did very well, all things considered. The day started off a little slow as we had to call Enercept to clarify the overall building dimensions. They were supposed to be 16 feet on a side, including the thickness of the outer panel skins. This is what we had specified in our plan, this is what I'd discussed with them, and this was what their designers confirmed we were supposed to get. However when we put a set together on the deck, they came out to be 16 feet not including the outer skin! We came up with a good solution that won't involve much extra work -- we're going to put a 1/2 inch of OSB all around the rim board after the panels are up, thus allowing the panels to extend over the decking by the 1/2 in thickness of the outer skin but still have a surface for that skin to bear on. Not a pretty solution, but it will work, be fairly easy and not too costly.
The panels fit together very easily and each wall was consistently 16 feet long, so everything came out precisely on the (new) corners. Very few of the panels were a full four feet wide. So even though they were ten feet tall, most of them were easy to handle. Mike, Lisa and I were able to set up one wall completely before lunch.
I got some sort of sore throat, so I voted to take a nap after lunch. Mike and I got about 30 minutes and Lisa got 15 or so after putting dinner in the crock pot. It seems to have helped.
After lunch and a nap we got into a good rhythm of setting walls. It took us about an hour to get the next one up, then Tigon showed up and we started moving even faster. By dinner time we had four complete walls up and were working on our fifth one. We ran into a couple more snags caused by errors at the panel manufacturing plant. All the designs were right but there were just dumb errors in execution. We had a spline post that was not cut to hold a header, a missing spline post from a panel that needed to have one on each side (so I made up a post from 2x4 and Styrofoam), and then, just before dinner we hit a really bad problem where they had left out a major structural post. Fortunately, Kevin, our designer, was working late and answered the main switchboard phone when I called. He walked me through what we needed to do to fix the problem, but by this time I was getting a little miffed (and Kevin was getting embarrassed) by all the problems. He told me he'd already notified our salesman (Bernie) and the president of the company. This was not at all the level of quality I'd expected based on my previous experience.
After dinner I got Mike started on building a set of steps to let us get up on the deck more easily, then I built up the missing post piece out of three 2x4s and two layers of 1/2 inch OSB, plus lots of glue and a ton of nails. We got it reinstalled in the panel, put the panel back in place and continued on. Ben showed up and was a big help lifting a couple of very heavy window headers into place. Earlier in the day we'd used the old tractor's forklift to raise another header into place. It worked, but it's hard to control the tractor's position on the slight incline around the foundation. Just a little nerve racking being up on a ladder trying to guide these two huge steal prong into place with a 16 year old at the steering wheel ;-)
So we ended up the day with 5 of the main floor walls in place. We still have the biggest of the headers to go, and I'm sure we'll use the tractor for that one tomorrow. Then it should be reasonably easy work to get the last walls up. Perhaps we'll even get the interior walls around the stairs built (we only need to build three of the walls). That would be very good progress indeed!
Seems as though I'm only finding time to update this journal every other day or so.
Well, we got just about as much done as I'd hoped. We did get the last three walls up and the stair walls framed.
Getting the big header up was a real challenge. First, it is very heavy--enough to be a load for Mike and me together. Second, we tried the tractor but the loader just doesn't have the reach to get it high enough at that location where the ground is low relative to the house. So we had to think like Egyptians and figure out how to lift this beast into place with just three of us and our own muscles. It took a while to figure out, but we finally did it and didn't put anybody in danger. I wish we'd had time to take pictures of how we did it because it was really neat, but we were concentrating on what we doing and not on documenting it for posterity.
So the way we did was this: We built a set of 'steps,' each about 12 inches higher than the last and placed them in the window opening. We then placed the header on the window sill and lifted one end of it one step at a time, blocking it on the down-hill side to keep it from sliding back (this turned out to be unnecessary). The final step put the header onto the support post in the wall. We then secured the top end so it wouldn't back-slide and lifted the other end of the header about 12 inches at a time, using the steps on the other end to hold at each intermediate lift. Finally, the last lift put it onto a temporary post where it sat until the supporting wall was in place. Throughout the whole process we had a board nailed on either side of the header so it couldn't tip over sideways. Next time I build a house, if I have any such large headers I'll just frame them on-site in pieces rather than have them prefabricated.
That one wall took us all morning to get in. The rest of the walls were relatively easy to finish up. The last pieces to go in were the post and headers around the kitchen window. The post was really the 'keystone' of the structure and it fit like a glove. I had to tap it down (o.k., pound it down) but it was just a snug fit. The two headers over the windows went in last without too much trouble. I did have to trim one, but that was the only panel we had to trim on the whole first floor.
During the late afternoon and evening we framed the three structural walls around the stairs on the first floor. These carry the load of the big beams that hold up the second floor. I probably overbuilt them, but wood, nails, and glue are relatively cheap compared with sleepless nights. With all that done, we are ready to start working on the second floor in morning.
Indeed we did start working on the second floor today. I took care of a few loose ends early, then Mike and I spent most of the morning getting the big beams in place. Each beam is made up of three LVLs (that's laminated veneer lumber). Each LVL is 12" high, 1 3/4 wide, and 14 feet long. They're a good lift for me just to carry one around on the ground, so putting one overhead is definitely a two man job. Good thing I had a good man to help me! We would set one LVL, put glue on it, put the next one up, more glue, then the third one, and finally, nail it all off (three rows of nails spaced 12 inches apart). The process went very smoothly.
Lisa and I took a break to run some errands while Mike took a short nap. The main thing I wanted to get was a laser square, but I couldn't find one and settled for a laser level that I hooked up to a framing square to do the same thing (see more later).
After lunch we put the top plates on the first floor walls. Top plates are just two rows of 2 x 6 lumber used to top off the walls and tie them together at the corners. We violated every warning sticker on the saw horses by using them to create a scaffolding with some big planks Dad had brought over last week. Mike and Lisa cut lumber and handed it up to me, I maneuvered it into the slot on the top of the wall and nailed it down. I also had to put a lot of caulk between the panel tops and the plates, as well as between the plates. We made pretty quick progress once we found the right job for everybody. A fringe benefit for me was spending a lot of time up at the level of the top of the wall where I could get an idea of what the view from the second floor will be like. Wow! I can't wait to see how far we can see from the cupola.
We finished off the day by laying out the positions of the second floor joists. Mike and I teamed up to do this. We marked off the positions along the beams and the top of the stairway wall, then transferred this mark to the outer wall using the laser level and framing square arrangement. It worked splendidly well and made quick work of a job that had been a real pain on the first floor. Why we don't think of these solutions until later is beyond me! In the morning, if we do it right, we should be able to get two jobs going at once and make good progress on getting the second floor joists in.
Today we set joists for the second floor. Lisa, Mike and I got off to a roaring start this morning getting all the simple ones done before 10 am. These were joists that run between the two big beams, are essentially the same length, and have simple hangers on either end. Mike and Lisa cut and I hung. Mike helped hang when they got ahead of me.
Next we started working on the joists that need to be cut at an angle. This is where things started to slow down a little. First, we needed some advice from the architect about how to anchor the hangers to the wall panels. We were going to use a style of hanger that wraps over the top of the wall, but these were not available, so we had to use what are called 'face mount' hangers. We didn't want to just nail them into the OSB sheeting on the panels. I thought it might work to put up some rim board on the inside of the panels. The architect confirmed that this would be a good idea. So putting up the rim board was an added step in our process, and not one that was very easy or fun. To get a good joint I wanted to nail with 16d (16 penny) common nails, which are the thickest, but I didn't have any for my nailer, so we did it my hand. On top of that, the rim board is just heavy stuff.
Then came the challenge of nailing the angled hangers. I won't go into details, but it took some trail and error to figure out how to do it right, and I have some rework to do to make up for the learning curve.
Tigon joined the crew when she got home from work, which relived me of some of the jumping up and down I'd been doing. With the four of us working together, we got all the joists on the north side of the house set by dinner. After dinner Lisa cut some grass, Mike picked up scraps, and I finished a lot of nailing on the hangers (I didn't put in all the nails as we put them up).
We ended the day around 8:30, which has been pretty typical. Tomorrow I hope we can get all the joists on the south side up and perhaps start on the flooring.
Day two of setting the second floor joists. We got into the swing of things and got two thirds of the remaining joists (south side) set, and the last one third cut but not set by lunch. It was pretty hot today (about 90) so we decided to take a long lunch and a nap before heading back out. The nap stretched on a bit...
Tigon gave us a renewed burst of energy and we finished off the last eight joists, then Mike and I took turns finishing all the nailing we'd left 'till later.' That's pretty boring work, so it was nice to have somebody to share it with.
Just before dinner we put up a couple pieces of rim board around the opening in the floor around the stairs. There's still a bit more of that to do tomorrow but I want to think about how to do it and my mind is getting muddled.
Lisa fixed a really nice, simple dinner of rhuben sandwiches. To give you an idea of how punchy we are all getting, Lisa opened a bag of chips at the table only to find that it was full of trash from yesterday's lunch! Apparently one of us put it back in the cupboard not realizing that it wasn't full of chips anymore. We had a good laugh at that and decided that it was a sign that we should use our remaining energy for the day to just clean up the job site and get organized for tomorrow. While we are all in good health, I do think the long days of physical labor are getting to us.
Lisa and Mike have made a great 'cut crew' these last two days. I know it's repetitive and it got boring, but they work well together, and I nail in hangers just about as fast as they cut, so it works out well. Fortunately tomorrow will be a different job for all of us--it's back to decking!
Mike is downloading several days' worth of pictures from the camera now, so hopefully we'll have them posted tonight. If not, it's because we dozed off during the upload ;-)
We started putting on the second floor decking. The first few pieces were a bit interesting what with trying to find a place to stand as we put the plywood down. After that, it went more smoothly.
Mid-morning, we got an unexpected show from a crop duster spraying Bud's fields for soybean aphids. Apparently there's a bit of an infestation of them this year and everybody's spraying. The crop duster made pass after pass right over our heads. He was so low it seemed like I could just reach up and spin his landing gear wheels. Mike said it was just like the scene from Pearl Harbor where the Japanese planes come in over the baseball field.
The weather got very hot and we knocked off at lunch time. I went back out in the afternoon to do some light work and found the tempurature inside the house, in the shade, was 100F! That's too darned hot to work. I settled for putting the basement stair landings in place, which wasn't much but is was an effort.
We got off to an early start putting the rest of the decking on the second floor. Our friend Perry showed up on his bike about 10am or so and provided a very welcome infusion of new energy. While decking is probably a two person job, three makes it less stressful. We worked until mid-afternoon when we trimmed off the last edges and called it a job well done. Emily (Perry's wife) showed up and we had a nice visit in the shade of the Elm tree.
In the evening, Mike, Lisa and I sorted the second floor panels so they would be easy to get to in the order needed. That was a bit of work.
We started setting the second floor wall panels today. It was good to see that Enercept was at least consistent, so the wall panels were also a bit 'too large' and so they matched the first floor.
The main problem to be overcome was how to get the panels from the ground up to the second floor. The old 8N came to the rescue again. We found that we could lift a panel up on the fork just far enough that the top edge of it was over the edge of the floor. In this position, the panel was at about a 45 degree angle. Next, two people on the second floor would lasso the panel with ropes and pull it up off the fork and onto the floor. This worked very smoothly and we only banged up the edge of the floor a few times when we got the tractor too close or the fork at the wrong angle.
We found that we could set the panels pretty smoothly, despite being on the second floor. Once a panel drops down over the sill plate it has very little tendency to tip over and we never felt like we were going to push one over the edge. Since we're going to bring wiring in from the attic on the second floor, we didn't have to drill holes in the sill plates like we did on the first floor, so this was one less step to do.
Lisa and Mike and I got two walls set, then Dad showed up and we got going on bringing the rest of the panels up. We had to load all the panels onto the deck before we kept building as we were going to have to close off our access area. I think we put up two more walls before calling it a day (I'm writing after the fact and my memory is fading)
We finished setting the rest of the second floor wall panels today. It went pretty quickly. Dad and Lisa and I worked from around 7 am until about 10:30 am. We puttered around at a few other things, then broke for lunch. Later in the day Dad came back over and we did a major job-site clean up effort, getting all the trash from around the house piled up, getting the excess lumber and yet-to-be-used lumber stacked neatly. Finally, we picked up all the pallets and plastic that we'd used to store the panels. We'll have a nice big fire with those pallets!
Today is also our 20th wedding anniversary, so we went out for a nice dinner and didn't work the evening.
Dad and I spent a good part of the morning putting on the top plates on the second floor exterior walls. This isn't a fun job and it doesn't show, but it needs to be done. It's also one of those jobs where you use a lot of sticky goo and it just gets all over. Dad did all the cutting and I worked the pieces into the slots on the top of the walls and nailed them in. It was a pretty good division of labor. The weather in the morning was quite tolerable considering the time of year. We had a nice breeze.
We knocked off work at lunch time as Dad and I both had some other things to do. The weather was getting a bit on the hot side, too. I went down to meet with the architect to discuss some of the details for framing the ceiling, cupola, and stairs to the cupola. It was helpful as I got all my questions answered.
Munn delivered the lumber for the second floor ceiling and roof just as I was leaving. When I got back I discovered that they'd made rather a mess of it. They like to just dump bundles of lumber by sliding it off the truck. This usually results in the strapping on the bundles breaking and the lumber spreading out. On a couple of deliveries they've broken stuff in this way. Today's delivery was one of those. On top of that, we had to re-stack about a hundred pieces of lumber. Fortunately, Dad showed up to help and we made fairly quick work of it.
The first order of business today was to take delivery of the windows. It shows just how optimistic I was about how long this would take that the windows arrived about a month before we'll be ready for them! Everything seems to be in good order.
We decided to go with Pella ProLine windows. After a fair bit of research we concluded that all the decent windows have nearly identical energy efficiency ratings. The differences between brands appears to be in style, complexity of their hardware (or cleverness, if you prefer), and the degree to which one can see the 'tracks' upon which the windows ride. The other big difference is price. For the same energy performance, you pay between 50% and 300% more with any other brand than Pella (except Andersen, which is pretty comparable price wise, though slightly higher). Pellas can get really expensive, too, if you go with custom sizes, colors, etc. If you're willing to pay attention to choosing the sizes Pella mass produces, and pick the colors that are available, then you can save a bundle. On the other hand, if you just have to have that one special size window, then you're going to pay.
Lisa and I finished up a little work on the second floor joists around the stair opening. We slipped a joist in at the living room edge to support the very edge of the floor. I'd left it out because I wasn't sure how I wanted to handle that edge. Not too big a deal. We also slipped a couple of pieces of rim board in on the east edge in much the same situation.
In a bit a good luck, I found the router bit bearing that had flown off a few days ago. It was laying on the floor in the basement under where a pile of lumber had been. I also spotted the tiny washer and screw that hold it on the bit.
We then put up the three walls around the stair opening on the second floor. The only interesting thing about this was that Lisa and I got a chance to do some 'design on the fly' for the first time. There have been lots of time during the design phase of this project that we'd said something like "Well, when we get to building that we can see how it looks and change it if we don't like it." So today we had to decide how long the partial walls that extend along the hallway from our bedroom and along the inner wall of the office should be. We considered how much of the second floor you could see from the living room and how big a vertical plane we'd create going up the stairs. In the end we opted for smallish walls, extending just four feet from the south side. We had an idea that we could place some long, thin piece of art work on the south east wall that would go from the second landing up to the top of the second floor -- perhaps a banner!
No work these days. We went out of town to see my brother Dave get married.
This also marks the end of the three weeks of vacation I was taking to blitz the house. From here on out we will be working evenings and weekends. I don't think I'll be updating the journal every day since daily progress will be relatively small. I will try to update at least once a week, probably more often.
For the past three evenings we've been working on putting up the main beams in the second floor ceiling. These beams serve two functions: First, they provide support for one end of the ceiling joists that run from the "corner" walls (those that are not aligned with the center core) into the middle. Second, these beams support the cupola over the core.
Each beam is a double 2 x 8. They rest on the exterior walls, the south wall of the stairway, and two posts on the north corners of the stairway. The challenges on these were getting them all square with the rest of the house and lugging the lumber up to the second floor. It's just a small glimpse of what we have ahead of us for moving all the roof lumber up!
Monday and Tuesday were pretty beastly hot, but today (Wednesday) was just fabulous. Not hot at all. This weekend is supposed to be very nice.
My brother Chuck, who is back from Australia for Dave's wedding, came out this afternoon with Dad to work while I sat inside and computed for my living. I felt a little guilty about having them working when I wasn't there, but they wanted to.
They did two really useful jobs. First, they moved a lot of lumber up onto the second floor. Since this was all 2 x 8 boards that represented a lot of physical labor. Then they put up the four remaining ceiling beams and cut all the "straight" ceiling joists to length and cut the diagonal off the outside end of each one. It's really nice to have family who helps out. It surprised me how having some help from time to time really re-energizes me.
After work Dad came back out and we got all the straight joists put into place. This involved not only putting in joist hangers, but also drilling the holes in the top plate of the exterior wall for access to the electrical chases that are in the panels. There were a few places where we needed to set a joist on top of a chase, so we had to drill these on an angle.
Dad left to go out to dinner with Chuck and friends which worked out nicely because at that point the next job was just nailing off all the joists which is a one-man job. It didn't take long. Lisa picked up while I nailed and we were ready to come in just as the light was starting to fade.
Lisa and I started putting up the joists that run on the diagonal. As usual, it took us a little while to figure out how to do it, and just when we got it, we ran out of light. I think we got three joists up.
We did get all the joists cut at 45 degree angles and made a little jig for marking the notch for the ledger board.
Lisa's parents visited today on their way back from K.C. to Indy. I started working fairly early on putting up the rest of the angled joists, and since Lisa was busy with her parents and Mike was still feeling poorly, I just worked by myself. It was a nice change, actually. I just plodded along at a steady pace. It certainly took me longer than if I'd had help, but it was a nice day to work outside and the work was not too difficult. By mid-afternoon I had all the joists up and I came inside to do some planning for the next phase of the operation, which is building the cupola. I was just finishing that when Dad called to say they'd gotten back from their trip and wanted to know if I needed help. He came out for an hour or two and mostly we moved wood, went over my design, and cut some special corner pieces for the cupola. We didn't work late as we all (my parents and Lisa's) went out for dinner.
We got off to a good start this morning. I got the rest of the special corner posts cut on the table saw in the shop, then loaded up the rest of the lumber for the cupola walls.
Dad showed up around 8:00, I think. We marked out where the cupola walls were to go on the four beams around the stair opening. We found that it all lined up pretty well. So we cut eight bottom plates and test fit them. They were just a hair long, so we shaved about a blade width off each one using the radial arm saw. Then they fit perfectly.
Dad did all the cutting today. We made a little jig for guiding the circular saw at 22 1/2 degrees. There was a lot of wood to cut up, and he chopped away for most of the day. I assembled the walls on the floor.
After we got out first wall assembled, we decided to see how difficult it was going to be to lift it up on top of the joists and put in position. Our first attempt was rather slow and complicated, but it worked. Then we decided to just put a couple of pieces of flooring on top of the joists so two of us could work up there safely and erect the walls the traditional way. This worked better and was much faster.
We did have to come up with a clever way to lift the walls up to the platform. For this job we made a sling between joists to hold the wall while we lifted it a few feet at a time. With a little practice, Dad and I could push the wall all the way up with just three lifts while Mike and Lisa manned the ropes to hold it in place after each lift. Then I scrambled up onto the platform and pulled the wall the rest of the way up. Finally, Mike came up onto the platform and the two of us walked the wall into position and nailed it down.
After erecting our second wall, we decided to go ahead and build all the walls before putting any more up. This seemed to most efficient way to do it. As we got closer and closer to finishing we realized I hadn't order quite enough lumber and so we scrounged around for any odd bit of 2 x 6 that was laying around. In the end we got all eight walls built and tomorrow we can start putting them up.
Today we put up the cupola walls. This went very smoothly using the methods we had worked out yesterday. We had all the walls up in a few hours. The next job was then to tie each wall to the next with the double top plates. This involved me standing on the long step ladder which was on the platform on top of the joists. From this vantage point I could get the top plate into position, align the walls, and nail them together. The first couple of times I went up I was a little nervous, but it got easier as I went on. The hardest part of the whole job was moving the platform around. Dad and I both stood on ladders and did a lift and slide thing. When we were almost done we discovered that it was a little easier to get on the back edge and just push horizontally.
Late in the day we started work on putting up the rafters for the roof. Since none of us has any experience building a roof from scratch (not using trusses), and certainly not a roof as complex as this, we had to do a lot of head scratching. We finally got one rafter up but not permanently as the sun was sinking low. There's only so much you can do in one day.
Today we figured out how to make our rafters fairly well. Lisa and Dad actually measured and cut everything while I stayed top-side to help set them into position and nail off the upper end. We did a lot more head scratching before we finally got it down, but now we should be in good shape to get through the rest of them. We finished six tonight in the two+ hours of daylight we had to work. Tomorrow we'll probably do twelve or more.
Finished off the 'straight' rafters tonight, except one we'll have to go back and trim just a hair. I've come down with whatever Mike's had and felt crummy.
Mostly did head scratching and trial and error cutting tonight. I was working out the angles for the corner double rafters. These are pretty funky beasts for several reasons. First, they run from each corner of the cupola to the corresponding corner of the main walls. They are double 2 x 8. They project from the main wall of the house at a 22 1/2 degree angle, bisecting the corner. So the ends of the rafter tails have to be cut at an angle, the seat of the bird's mouth has to be flat but the plumb cut on the bird's mouth has to be angled, and the cuts at the top end have to be similarly angled. On top of that, since they're double beams, each half of the beam has to be a mirror image of the other half.
I made two test pieces and I think I have it about right. I'll cut one more test piece tomorrow before I make a real one. This was a short evening's work.
Lisa wanted to cook a nice dinner tonight, and we're still a bit under the weather, so this was a short night. Mike and I got the first double beam cut and placed. It went really well, though we'll have to improve cutting efficiency to do the rest. Everything fit just about as well as you could want.
Mom and Dad stopped by with some of their friends from the Friday night group to show them the place.
We go in a good days work today. We got up all the corner beams up. We made two measuring errors, both of which we recovered from, one with just a re-cut, the other with some shimming and glue. There wasn't really much interesting about this operation other than that we seemed to have figured out how to measure correctly most of the time.
We also started putting the OSB on the cupola walls. Perhaps it would have been better to do this before we erected them, but we were worried about their weight. As is turned out, the amount of OSB used (after you cut out the window hole) was pretty small, so weight wouldn't have been a problem.
We cut one panel and put it up to make sure it was right, then proceeded to cut the rest of the panels. Mike hoisted them up to the second floor using his rope and pulley arrangement. When we were almost done cutting I came up with the bright idea of cutting all the panels together in one stack. Would have worked great if I'd thought of it!
With Dad gone today it was just Mike and me first thing today. We started off trying to do two different jobs but that didn't work out well since neither of the jobs were one-man (they were both really about one-and-a-half-man jobs). I had Mike working on putting the OSB on the cupola walls while I worked on figuring out the angles for the remaining rafters.
After a while we figured out that we needed to work on just one thing at a time, so we concentrated on doing the OSB for the cupola. Lisa came out and helped, too. We got that job all done by about 1:00, then came in for lunch and what turned into a long nap. After the nap Lisa and I moved lumber for the remaining rafters up to the second floor and cut the ends of 16 of them, while Mike did his homework. I worked out how to do this pretty well with just two people. When we started to measure for length we realized that we needed to get the twist out of the ceiling joists because it was pushing the rafters around too much to make spacing accurate. So we chopped up junky 2 x 8 for blocking and started nailing that in. After a break for dinner, Mike and I went back out and worked on the blocking some more. It's about half done.
We put up the rest of the blocking between joists.
Then we started working on the rafters again. Mike suggested that we cut all the upper ends of the rafters before we put any up. This seemed like a reasonable idea so off we went. The job was to cut a compound angle on the end so that it would fit nicely against the beams that run down from the cupola to the exterior wall. Since the circular saw can't cut more than a 45 degree angle, I had to figure out how to cut on the ends of the boards to get the right bevel. To see how I did it, look at the last two pictures in the Rafters and Cupola section of the gallery.
We trundled our way through this cutting job. Mike didn't want to let me stop even though it was getting dark. I accused him of being a slave driver.
Mike and I put up rafters. We got the process down pretty well. He climbed up and I stayed down. We put a board across the current rafters to help hold their spacing, then Mike measures the placement of the upper end of the new rafters. I handed him a rafter that had one end cut and he put it in position. I marked the location of the outer wall, then took it down and cut the bird's mouth and tail on it. Then I handed it back to him and we nailed it in. It might have been a little easier to measure them rather than put them up and mark them, but we got every one of them right this way, which is something I can't say for our measuring approaches ;-)
Around 7:15 or so our neighbor Wanda stopped by. We hadn't met her yet, only her husband Doug. So we stopped work to visit, which took the rest of the day-light we had. A small price to pay for getting to know your neighbors.
Mike and I almost finished those pesky rafters. We were within striking distance but just ran out of light again. We may have to get some artificial light out there as it keeps getting darker sooner.
Rain. This is only the third day of rain we've had in six or seven weeks of work. For construction work you can't complain about that. As a farmer you can complain plenty. From what I hear this rain will be too late to help the crops this year.
Tomorrow I need to get the OSB for the roof delivered. I'm hoping they can deliver it on a lift to get it to the second floor and we'll pull it in through a window, but I don't know if that will work. I should have done that today, but I keep losing track of the time and the day of the week. I can't believe it's Thursday already!
The OSB was delivered today. When I first ordered it I just told Larry at Munn to deliver the OSB for the roof. I didn't realize that they had quoted me enough OSB to do not only the roof of the house, but also the porch. That was about twice as much as we needed! Fortunately, Lisa asked me about it at lunch today and I was able to call Larry before the shipment left.
Munn has a boom truck they can use to deliver goods that need to be lifted to heights. They normally charge for the use of this truck, but it's kind of funny how they do it. They have an hourly rate, but then quote you a fixed amout based on some estimate they make as to how long it will take to unload. Anyway, I didn't want to get stuck paying a lot for the truck to sit around as we unloaded, so I put out an APB for people to help unload. Then, when I discovered we only had half as much to unload I had to tell people not to come. In the end, our friend Russ Buechler, my Dad, Lisa, and I did the unloading, along with a little help from the truck driver. The truck was able to lift the load up to a second story window, where we could slide it off and stack it on edge in several locations around the building. It took about an hour to get it unloaded, most of which was spent waiting for the truck. We probably only had to 'work' for about 15 minutes.
I was really pumped for today. It felt like we'd been stuck working on the rafters for so long (it really hasn't been, but it felt like it) that I really was looking forward to doing something that would make it look different.
We broke the day's work into two parts: putting the sheathing on the roof and constructing the rafters on the cupola. I worked most of the day on the rafters with help at times from Lisa and Perry. Dad, Mike, Lisa, and Perry worked on sheathing. Working this way we got a whole lot done.
The sheathing moved along really nicely. Since all the OSB was already on the second floor the big lift was up between the rafters. Perry proved to be quite adept at doing this. Mike and Perry did the top-side work, placing the sheets and nailing them down. I had designed a layout for using the OSB to minimize waste that was effective at that goal but made it important that most of the cut-offs be saved for reuse in other spots. It created some minor confusion, but in the end I think we only lost one piece to error.
I got the eight corner rafters up on the cupola. I made a king-post where they all come together at the top. We signed the king-post. The cupola rafters went in pretty well with a minimum of shimming to account for slight variations in the dimensions of the walls.
It rained for part of the day, but let up and we were able to get back to work.
We finished the sheathing on the main part of the roof today, leaving part of one section open for access. Perry was again a big help. We decided to have a big dinner with Perry, Emily, and my folks. We finished work around 5:30 by which time I was really starting to feel bad. The ladies put on a great meal and we had a good visit for a while until I just couldn't keep going and said good-night.
No work. Lisa and I went to the doctor and found that we were both suffering from various forms of respiratory ailments and need to take drugs and take a couple of days off to rest. I actually took Monday off from Xerox work even. When you work from home you really must be feeling bad if you can't show up for work!
In the evenings we worked on the basement stairs. Didn't do a whole lot because there isn't much light in the evenings and it rained.
The main job today was finishing the cupola roof framing and sheathing. Dad and I got the remaining 16 rafters put in. This wasn't too bad a chore, but we did have a few problems with getting the lengths right. Again, with all the funny angles, plus any twist in the wood, it wasn't hard to be off by a bit. Perry showed up and was a big help with sheathing the cupola. I had to perch myself on the top and just stay there because it's such a hassle to get up and down from there, so I was up on top, Perry was in the middle, and Dad was down on the second floor cutting. We worked until there was no light left and just about got all the tar paper on it but not quite.
This morning the metal for the roof arrived, much to our surprise. I wasn't expecting it until the middle of next week.
We figured it would make life easier if we had stairs in place before we started putting metal on the roof, so we kept working on that. We got a bit more done then the rain set in heavily and we had to stop. After several hours I was able to go back out and work some more, but light was bad and it was cold and windy. Pam and Weldon Abarr showed up to see how things were coming along, which was a nice diversion.
During this whole week I went out each night to work on the stairs. Between darkness and rain it was slow going, but after getting Dad's halogen lights I was able to extend my hours and that helped a whole lot. By Friday we had both landings completed for the first to second floor stairs and the stairs built from the first floor up to the second landing. I worked until 10:00pm Friday night and got the first stringer perfected for the final flights. At that point I figured we can finish the other two stringers in the morning and have steps for doing the metal.
The first order of business was to finish off the stairs to the second floor. I got an early start on the day and had stringer cut before long. Mike was our promptly and chipped in, then Dad showed up, and with plenty of hands we got those stairs finished off in short order. Is it ever nice to have them. I think after building six runs of stairs now I'm starting to get the hang of it.
The main job for today was to put metal on roof. Unfortunately is was a rather breezy day, which isn't ideal for handling 16 foot long, 3 foot wide pieces of sharp steel. Still, we had great help and did really well. Before we even got started much, Perry showed up with his friend Armand and Armand's wife, Jennifer. You have to be impressed with the good will of people who will show up to help build a house for someone they don't even know! Jenn and Armand are both just super nice people and it was great to have the extra hands.
Armand helped Dad handle the steel sheets and cut them to size. Perry was up on the roof with me receiving them and getting them screwed down. We had to put up a ramp to slide the sheets up from the second floor out the cupola window, which worked well enough but they did get caught on splinters sometimes.
Perry and I had to put down a drip edge piece along the outer edge of the roof, which meant cutting back the tar paper until it was flush with the plywood, then nailing the drip edge down and joining the two pieces necessary to finish a side. Then we had to construct a perpendicular chalk line from the edge up to the cupola to align the first sheet of steel. We did this by using two long tape measures secured at each corner of the drip edge. Getting those tapes to catch in the wind was tricky.
Dad and Armand were cutting the pieces with an abrasive blade on a circular saw, which made a horrible racket but worked well. The big challenge for them was getting the orientation of everything right since they had to cut the pieces up-side-down and each piece was oriented so it could only work in one way. We had a number of pieces that got confused, but we never actually wasted any metal.
When they were done cutting, they smoothed the edges a bit so it would be safer to handle, then they rolled the piece laterally so it made a long tube and tied it in this shape with two ropes. This kept the piece rigid as it was handled on its way up to us. When we got it, we undid the ropes and laid the piece in place. For the first piece I had to scoot down to the edge of the roof and position it so it had the right amount of overhang, then Perry screwed it down. For the other pieces, I had a little t-square type deal that let me align each piece with the adjacent piece.
We ended the day around 5:30 because Perry and Armand had to get home in time to go to the Engineer's Ball this evening. I was glad to stop since being up in the wind all day was wearing me out. We got three sections of the roof done, which I thought was a good day's work.
Today's crew was smaller than yesterday's, but no less hardy! With one day's experience under our belts, Mike, Lisa, Dad, and I were able to pick up where we left off and finish four sections of the roof by 3:30. We made improvements in the process all around that let us work more smoothly and keep everybody more uniformly busy. I started drawing a diagram of all the pieces and tracing it on the back of a piece of paper so the cut crew could view a piece from both sides. Dad made a new device for removing the burns from the cut edges. He also came up with a clip to put over the leading edge so that it wouldn't catch on the wood ramp when he slid it up. Lisa suggested very cleverly that we use the cat walk in the cupola to temporarily hold the pieces and send them across to the other side of the roof, rather than having to carry them all the way around in the wind. Mike and I figured out how to dove-tail our drip edge and measuring work on the next section with our wait time for getting pieces from the cut crew. All in all it just went very well.
We worked on metal until about 3:30 when Dad had to leave. That was probably o.k. since we'd finished the seventh section and the eight section still needed to have the last pieces of plywood put down and tar paper put on. Lisa and I tackled that while Mike did his homework. He came back out just in time to help me lay in the last piece of plywood.
I tar papered while Mike and Lisa cleaned up and Mike put in a bunch of nails that I said we'd "get to later." We finished the day around 7:00 and went out for pizza. We all went to bed around 8:30 and slept soundly.
Today we had a short evening's work. Dad and I got a few of the small pieces of metal put up on the roof while Mike put the second story of the chimney chase up. It went smoothly but we ran out of light.
This evening I figured and cut the stringers for the first flight of stairs up to the cupola. There are four stringers in this set, rather than the usual three, because we are doubling up the outer ones to make a 'bent beam' structure so that the landing at the top can cantilever out over the stair opening without a column underneath it.
These were the longest stringers I've cut so far and I'm happy to report it went very well. They all came out nearly identical.
We put the bent beam together with glue and bolts and hoisted it into place. Getting into place wasn't as difficult as we thought it was going to be because it was long enough to span the opening and I could reach it from below to get it onto the second floor. From there it was just some heavy lifting to get it up high enough and hold it in place while we leveled it. We used some clamps to help out.
We built and installed the landing in the cupola stairs. This was a bit tricky since we had to drill holes for the bolts that protrude from the beam, and lifting it into place involved some awkwardness. We got it in and nailed and braced it well.
The other two stringers went up tonight. We had surprises both good and bad. The bad was just how difficult it was to get these into place. With no place to sit or stand that was underneath the center of gravity, we had to use a rope to hold the upper end of the stairs, a 2x4 across, and a good bit of grunting to get them up. The good surprise was that they fit perfectly and were square right where we set them. It couldn't have been better. Mike helped me cut the treads and then he installed them all. With the catwalk still in place you can't really walk up these yet, but you can sort of crawl up.
Today was just a beautiful day. We started off by doing a major cleaning and picking up. After so many days of just go-go-go, we'd let the tools pile up, the scrap pile up, the dust pile up... Besides, as the project progresses our need for tools change and so we had stuff out there we didn't need. So we got a new tool bench which can stay until drywall time, and a lot fewer things to trip over.
The main project for the day was putting the metal on the cupola. While the day started off with very little wind, it picked up as time went on and a few of the late pieces were a bit of a struggle. But I had good help from Mike and Dad and we got it done.
The other accomplishment was that I cut the stringers to the last flight of the cupola stairs (and the last flight of stairs in the house!). Lisa helped me hold one in place to make sure we located the cupola floor in the right place. We got that marked off and called it a day.
Again we lucked into perfect weather today. We started off the morning by finishing the chimney case. It has to go well above the roof so that it meets the "higher than anything within ten feet" rule. We got it up and sheathed in most of it, leaving some parts open for the chimney installers. We placed the sheathing such that it overlapped the joints between vertical sections of the framing which gives it a good deal of rigidity.
The rest of the day was devoted to putting up the final section of metal on the roof, which had to be cut to go around the chimney and flashed in such a way as to drain the roof on the upper side of the chimney. We're all getting a bit tired of roof work, but there's just a bit more to do to get the job finished. We'll get it done soon.
Most the evenings during this week were spent working on the framing for the cupola floor. We put up on triple 2x8 that spans the width of the cupola at the point where the stairs arrive. Off of this, we stuck a bunch of short joists to one side and a couple of long ones to the other side. Mike and Lisa were out helping me most of the time (one or the other or both), so I didn't screw up too often! By the end of the week we had almost all of the framing in place and the last flight of stairs were installed.
With the cupola floor almost finished we pushed on to get it done. I really need something accomplished to keep my motivation level up. Dad and Mike helped me figure out how we were going to cantilever the little wrap-around part of the floor, which was not too difficult. We got that done but were unhappy with how springy it was, so we put in some blocking to keep the joists from twisting and that firmed it up nicely.
We then started putting down plywood for the floor. There was some fun cutting of odd angles as we tried to use what little flooring we had left. I muffed a piece and had to cut up one of our three remain whole pieces. No great loss as that still leaves us with two extras which we don't as yet know what we'll use them for (flooring attic?). Anyway, we got most of the wood cut but then went in for lunch and it started raining. I had some Xerox work to do, so I decided to do that, then I took a nap to get rid of a headache. By late afternoon it had cleared up a bit and Lisa and I went out and finished up the flooring, then built temporary railings for the stairs and attic.
We finished around 5:30 or 6:00 and were finally able to stand in the cupola more or less like it will be when done. With the sun setting under the clearing sky it was a moment worth waiting for. We both felt that all the work was going to be worth it. The cupola really does have a magic quality to it. The view, the height, the intimacy of the space inside contrasted with the vastness of the space outside--it really works. I went to bed happy.
More boring roof work. Next time I build a house (ha!) I contract out the roof work!
We put flashing around the cupola and then installed the cap pieces that go over the seams between each section of the main roof. Perry showed up just in time to help with that chore, which was a good thing because Mike had homework to do and there was no way I was going to be able to manage those 10ft long sails up there in the wind we had. It took us a while to figure out how to do the job well, but eventually we got it. Perry had to leave with two pieces to go, so Mike jumped in and helped finish it off. It looks good.
It's getting dark by 7:00 now, so roof work is difficult and inefficient--by the time I get all the tools and supplies out there I just haven't got much time left. Perhaps it's just an excuse because I'm tired of roof work!
We started working on windows. I figure there's not much more we're going to be dropping that could break a window, so why not? Mike and I are the window team, since he was such a huge help doing the replacement windows in our current house. We started with the one by the back door (hey, I'm learning, you don't start with the front of the house). that went pretty smoothly, although Pella's instructions don't match the product at all.
In the first evening's work we got three windows in (working counter-clockwise from the back door). Then the next night we got two big windows in during a short evening's work. Thursday we got one more in during another short evening. Friday both Lisa and Mike pitched in and we nearly got four windows done in a couple of hours. We got stopped by darkness as we tried to get the last kitchen window in.
During the week I continued to meet with HVAC people. This is definitely the big negative surprise of the project--how much it will cost to put in a heating and cooling system. Based on very little information, I had underestimated the cost by about half. It costs what it costs, but I've been surprised by the range of estimates so far. The low is almost half of the high, and the low guy is supposed to be one of the best.
The weather was just wonderful today. Mike woke Lisa and me up this morning and we got a good start on the day. First we got in the last kitchen window, which was quick work. Then we tackled the big combination window in the conversation area.
This window is actually three units mulled together (that's what the window folks call it when you connect several units). We had a mull kit from Pella which had pretty good instructions, though they didn't match what we had exactly. Part of that was because we were putting together windows from two different Pella product lines.
The biggest single problem with this operation was the shear weight of the combined window set. At about 7 ft long and almost 5 ft high, it's a humdinger. This is another one of those operations where I wish we had pictures of just how we did it, but it was just the three of us and nobody to take pictures. Mostly it was just one heck of a grunt-lift for Mike and me standing on boards across four sawhorses and Lisa grabbing the window from inside. Mike and I could hold it ok by resting it on our knees, but it was awful heavy to lift and we just made it. Once in, though, it sure looks nice!
That did it for the morning and we had lunch. Perry showed up and we worked on putting the hip cap on the cupola roof since the window was low. The roof was dusty and thus more than a little slick. I switched to sneakers and Perry just went barefoot! We ran out of metal, so we only finished 6 of 8 ridges. I'm not sure if I didn't order right or we didn't get what we ordered. I'll have to check the invoices.
Perry took off at that point and Mike and I started working windows in the cupola. We got four in fairly easily. Mike did the outside work while I shimmed and futzed with level and plumb. The darned bugs started getting really fierce and Mike's arms were reacting with red splotches where ever he got bit. It was these little "pirate bugs" that are really bad. They bite hard and are so small you can hardly see them. Add to that the darned Asian Lady Beetles that just fly dumbly into you and bite your neck and it's no wonder that he was tired of being abused and wanted to stop. Lisa, however, could see that we were just a couple more hours work away from finishing the cupola windows and she stepped in to take his place. We squared and nailed and plumbed and leveled until the sun was setting over the horizon but we made it. I nailed off the last two as Lisa went in to get supper on the table. All in all, a good day's work! I'm very proud of my crew.
Today must have been the nicest day in two months when we didn't bust a hump on the house. We had a slow morning getting up and going. We had a nice, hot breakfast. I then puttered around in a fog for a while trying to decide how exactly I wanted to build my scaffolding for getting to the second floor exterior. I had a pretty good plan in my head, but as I started to put it together I kept changing my mind about one thing and another.
The basic idea is to take advantage of the ledger board that needs to be installed for connecting the porch roof to the side of the house. To this board I attached three of the joist hanger that will eventually be needed, then used the hangers as attachment points for up-side-down "L"s. On top of each L, I placed 2x8 boards with cleats on the bottom to provide lateral stability. Once I figured everything out and made the Ls and put the cleats on it worked out pretty well. I think it will take about 20 minutes to move it from one side to the next, so we'll just leave it on one side until we've done everything we need to (window and siding), then move it.
I also made a cardboard template for the special pieces of sheet metal I need to have fabricated to cap the ends of the roof hips. When all is said and done on this roof, I may have been better off having standing-seam roof put on, but that's big bucks.
Tigon was home for most of the day and helped out some. She and Lisa did some gardening chores and she and Mike had some time to visit. We all went out for dinner, then we dropped her back on campus so she could get to her dance club meeting.
What with one thing and another we didn't do a lot of active work on the house this week. It's getting dark early and we had some other evening things to do, plus I had to figure out just exactly what sort of trim we wanted around the windows and how I was going to make all that. After researching various trim materials (HardiPlank and others) I decided to use cedar. The main factor in deciding this was how easy it is to work. HardiTrim is a pain to cut and you really can't route it or shape it.
We also had to decide on exactly what width of siding we wanted and then figure out how much of both the trim wood and the siding we needed. By the time we figured all this out we just had time to get it ordered and delivered before the weekend.
With all the raw wood for the trim in hand, Mike and I had a lot of mill work to do. In total, there were over 200 pieces of trim that we had to cut. In order to make it look good and shed water well, I put a slight bevel at the joints. Because of the nailing fin around the windows, we had to route a shallow, wide rabbet in the back. Glad to have the joiner.
I was really glad to have Mike's help. This was the kind of job where I could make one set up on a machine, then cut for half and hour. In a situation like this, having someone to help handle the material is a life saver. Plus it gets kind of boring after a while and Mike has a good sense of humor which helps the time go by.
Lisa and Tigon made the major decision about house colors and braved Lowes on a busy Saturday to get paint, primer, caulk, etc. Apparently the paint desk was a mad house staffed by mad men.
In the evenings I brought the halogen lamps outside so I could work on putting up a few pieces of trim to see how the system was working. I didn't get much done but did discover a few things, like how uncomfortable it is to work in the dark with a cold north window blowing at you.
Reasonably good weather, if cool, was forecast for these days, so I took a couple of days off from work to blitz the siding. My hope was to get a lot done, but the reality was that siding takes time. Especially when you're doing the kind of trim work we are.
Dad was out all four days, and Mike pitched in over the weekend. On Thursday we started with the northeast side, which we thought would be an easy place to try our hands, and since it would eventually wind up under the porch roof, if our water proofing wasn't perfect yet it didn't matter as much.
We found that we could cut HardiPlank siding pretty easily with a circular saw and a regular carbide tipped blade, although it destroys the blade for use in wood. The dust is pretty bad, but with a good breeze it was carried away. We only trashed one or two pieces of siding during our training period and the results looked exactly as I'd hoped they would. In fact, Dad and I both stood back and commented that it look almost like our old house on Wood Street. This is good because that's the vintage we're going for.
We didn't have much trouble getting the siding aligned, and even without a nail gun the nailing didn't take that long. I think our big lesson was not that any one task took a long time, but that with siding you just have so darned much of it to do that it adds up.
On Friday we tackled the second floor of the northeast. The second floor sides are a lot more work than the first floor because we have more things to do, and, being on the scaffolding makes life a little more fun. Here are all the steps that we do on the second floor:
Install ledger board for where porch roof will attach to house which also serves to hold the scaffolding
Install windows (already done on the first floor)
Apply window wrap tape around windows (will do on the rest of the first floor windows)
Nail off any of the panel edges that we weren't able to reach when we put the panels up
Install flashing where porch roof will tie in
Apply tar paper to wall
Install trim around windows
Install corner boards
Measure, cut and install notched soffit piece that covers opening between the top of the wall and the underside of the roof (between rafters)
Put foam closure strips under roof metal
Screw down edge of roof metal (not done earlier)
Install siding
Caulk
Take down scaffold and move to next side
After getting this done I was seriously getting worried about how long it was taking and decided to concentrate on doing only the second floor first, figuring that if I was going to have to work in bad weather, I'd rather be on the ground. By now I can't recall how much we got done on each day, but by the end of Sunday we had almost finished second floor of the west side. We had just two more boards to put on but we were plumb out of light.
I had gotten over my discouragement at how slowly we were going because each day I could see that we were getting faster and smarter about how we did things. I was also starting to think about what more I could do during the week to prepare things ahead of time. If there is decent weather next weekend we might be able to make a run at finishing the second floor.
Oh, yes! While the "guys" were out putting on siding and such, the gals (Lisa and Tigon) were in the shop madly priming and painting all the wood trim before we needed it. They really had to push hard to keep up with us, given that everything needed sanding, priming and painting. They didn't get behind, and they didn't complain!
I did more shop work, preparing windows frames, soffit pieces, corner boards, etc. Using my new biscuit joiner I assembled all the window frames we need for the second floor. I also joined together the corner boards so they would be easier to install.
Lisa did a whole lot of painting this week. Tigon came out to help one or two afternoons. We're now all painted and ready for the weekend.
Finished putting up the siding on the west side. Was just able to get the boards in place before dark and get the roof screwed down but couldn't get the caulking done, despite Mike's help.
Mike finished caulking the west side and it is now done. We took down the scaffold, moved it to the east side, and put it back up. Mike hauled some dirt up with the tractor to fill in the settling around the back door so we could fix the stairs. We cut and installed hangers on ledger boards for the rest of the walls so they'd be ready. Mike tar papered the window openings. We hauled the rest of the first batch of HardiPlank from the west side to the east where we'll be needing it. It was cold out, but as long as you keep moving you don't really get cold. In fact when we were moving the scaffold I got sweaty and then later had to change shirts because it was wet and that made me cold.
We're about as ready as we can be to take advantage of the weekend. Perry is coming over to help out, and possibly bringing a friend or two as well. Here's hoping the weather cooperates!
Our preparations paid off as were able to take advantage decent weather and excellent help to complete the remaining four second story sides in just two days! From here on out we should have an easier go it.
Saturday dawned clear but cold. The thermometer in the new house showed just 18F at 7:00 am, but my stalwart troops were out there ready to go. Mike was up and at work by 7:00 and Dad was only minutes behind. We had bundled up against the cold, and for the most part the combination of insulation and physical activity kept us warm enough. Hands and faces were the only trouble spots, and even those weren't too bad.
As you've already read, we have quite a list of chores to do on each side of the house. We were well practiced at it and were able to just chug along. Mom brought out some doughnuts and cheered us on for a while. Around mid-morning good ol' Perry showed up to pitch in. He was just the ticket to make things run perfectly. From our previous experience we knew that we could really use a fourth person, and Lisa was gone for the day. Perry was able to get in and put up siding on one end of the wall while I worked the other. He was that extra set of hands that we needed at critical times. On top of which, he's good company!
We broke for lunch having finished the east side. Mike, Perry, and I had a hearty lunch of left-overs while Dad went home. Some time after lunch, Perry's friend Eric Schmidt showed up to help. I am constantly amazed that people will show up to help somebody they don't even know build a house. I think there is (a) a whole lot of good in people that isn't generally appreciated, and (b) a fascination with building houses that people can't resist. Having Eric around made things go even faster. He did a lot of gopher work for us, which kept Perry, Mike, and me from having to jump in and out the windows all the time. He also ran cut siding up to us from Dad, which saved Dad time and made material flow more smoothly.
In addition to a great crew, we also had a new tool that improved things significantly. We rented an electric shear from Munn's for cutting the HardiPlank. It works a bit like scissors except that it has three "blades." Two of them are stationary and one moves up and down. As you guide it through the siding it shears off about a 1/4 inch wide strip of material that curls up between the two stationary blades. It is quiet, dust free, safe, and easy to operate. It also cuts a bit more cleanly than a circular saw. I don't think I'll buy one because renting it is relatively cheap compared with purchasing, but it's tempting.
The weather Saturday started out cold and clear, then got cloudy. It didn't warm up to much more than freezing, but there was little wind. If the sun had stayed out it would have been wonderful.
Sunday we had Lisa back on the team to replace Perry and Eric. Again we started at 7:00am and again it dawned cold and clear. Unlike Saturday though, it stayed clear and so we got the benefit of a warming sun. Unfortunately it also got windy, so the effect was largely cancelled out. Later in the day the wind dropped to almost nothing, and we rejoiced in splendid working weather.
The goal for the day was to finish the remaining two sides of the second floor. I think I may have gotten a bit over confident because I messed up one of the soffit boards by cutting it as the mirror image of what it was supposed to be. We also had to do some unique work trimming around the double window. These two items slowed us down a bit, but we still managed to finish the south side before lunch. Just then, Mike's shop teacher, Craig Boylan showed up, which was a great surprise. Mike showed him around the house and work shop and had a really nice visit with him.
After lunch we got the scaffold moved for what should be the final time, We picked up a couple of advantages on the final side since both corner boards were already in place and we didn't have the soffit boards because my mistake earlier had cost us the last of the material. We were able to get the side complete except for the soffit board, which I will put on this week in the evening. By mid-afternoon the sun was warm, the wind was calm and the end was in sight. We were feeling pretty good about our weekend's work.
There have been some days when I get discouraged by the magnitude of this project and wonder how we'll ever get it all done. Then there are days like this where I discover that with a little luck, a lot of good help, and hard work we will make it.
Didn't do anything on the house on Monday. Had other activities going on.
Tuesday, changed the oil on the Altima, then got into the shop to get a bunch of the window trim frames put together. I want to make sure we have enough stuff to get us through the coming weekend. The weather report is so-so right now.
Wednesday, got the rest of the trim frames done, except for one that I have to remake because I scavenged the wood. Also got all the corner boards joined together for the first floor.
Thursday, Lisa did a lot of priming today. I'm glad she's doing this--I'd go mad if I had to do it! She'll paint it all tomorrow. I put window wrap on six of the first floor windows. We should be in pretty good shape for the weekend. The current weather report is looking good.
Compared to last weekend we had brilliant weather. Saturday was cloudy but relatively warm (highs around 45 or so). Sunday the sun broke through and let us take our overalls off and work in just sweatshirts. That was a pleasure!
More of the same on the siding. On Saturday we did the north side first floor, the west side first floor, and a good chunk of the south-west side first floor. The doors haven't arrived yet, so we have to skip the three sides that have doors in them.
From the pictures you might notice that on some sides we didn't take the siding on the first floor all the way to where the second floor siding starts. This is because porch roof and ceiling will be covering this area so there's no point in siding it. We did tar paper it just to help it get through the winter. On the south-facing sides we want to have a retractable awning, so we did run the siding all the way up.
Sunday we finished the south-west and south-east sides and got started on the cupola. We got all the tar paper, corner boards, and window trim on, plus a couple of sides of siding before dark. I finished up cutting the siding for the rest of the sides so that if we get a chance we can put in this week.
The main evening activities for this week were getting the fireplace enclosure ready for installation of the fireplace on Friday, and finishing up the last bit of siding on the south west side. Both activities went fairly well, although the fireplace installation looks like it could turn into a fiasco.
Thursday evening Mike and I got the soffit boards and last piece of siding up and took down the scaffold. We has to work by flood light for a little while, but it wasn't too bad. Lisa did some good work clearing up debris. Friday morning we had Ames Trenching come back out to put some more dirt around the foundation where it had settled. He used up all the rest of the big pile that came out of the ground.
The fireplace guy came Friday morning, too. They said they'd be coming with two guys, but only one showed up, which meant I had to help move the very heavy (500 pound) unit off the truck and into the house. After the installer had been working for about 10 minutes he came to tell me he was stuck because they did need an off-set for the chimney after all. This was my fault because I didn't know that a 6 inch chimney pipe was a 6 inch inside diameter pipe, which is more like an 8 inch outside diameter pipe. I'm not sure why the installer didn't notice this when he came out to survey before we ordered. So they'll have to order the offset and come back. This evening (Saturday) I was looking at the situation and noticed another problem, too. It has to do with the location of the outside air inlet. It is much further forward on the unit than I thought and will have to be run in a creative way. I think I'll have to have a 2 x 6 rectangular duct made because we won't have enough room to use a regular elbow. I think that will work.
I've gotten way behind on my journal writing. Work on the house got a bit sporadic for a while and my day job started acting up a bit, which kept me mildly distracted whenever I sat down at the computer. Beside, with the holidays and all I just let this task get pushed to the bottom of the list. So I'm just going to write as much as I can remember and not worry much about reconstructing the dates.
Over Thanksgiving weekend we had help from Dave and Brian (his step-son), as well as Mike and Dad on framing interior walls on the second floor. With such good help we made quick work of it. Most of the second floor walls were up in one day. Mike and I finished it up the next day. Interior walls were fun to do as we saw the shape of the interior space begin to emerge.
We had a warm day or two around then where we got the rest of the siding on the cupola, except for a couple of pieces around the top. It was one of those fantastic, warm early winter days when you can almost hope that winter will take the year off. Then you get socked with a blizzard, which is pretty much what happened.
In the picture gallery you'll see photos of us putting on siding in the snow. That's because the exterior doors didn't come in until the first week of December. Munn's truck was slipping and sliding all over the driveway when they delivered. I thought it was going to slide into the house. Door installation was pretty smooth and took a short, but cold day. I took a short tumble off a ladder when the pallet it was standing on turned into a sled in the wet mud and slid out from under me. Luckily I bounced pretty well and didn't hurt anything.
After Thanksgiving, the fireplace guys came back to finish the job. This time two guys showed up and they were done in a couple of hours. The next day I discovered that they hadn't cut away enough of the framing around the chimney and in doing this I knocked the fire stop loose. So I had them come back out to finish the job right. They were happy to do it.
I bought three cheap-o lock sets at Lowes so I could officially say the house was 'lockable', then we went down to State Farm to get insurance. Even though the new house is valued at about twice what our current house is, the insurance is about 30% less! New construction is apparently considered much safer.
With insurance in place, I felt better about testing out the fireplace. We didn't have any problems with it and it puts out good heat. Mike gathered and split a bunch of wood and we've been using it to heat the house on the cold days we work (and some of the not so cold days--I just like having a fire).
Early in December Mike and I put up most of the first floor interior walls. I got to make a fun octagonal post for use by the front door.
In mid-December the crew from Prairie Foam came out to spray the underside of the roof and rim-board with icynene insulating foam. That was fascinating to watch, though I don't think I'd like to do it for a living. It took the better part of the day (about six hours) to get it all sprayed. I think they did a very good job. Dave had mentioned a couple of things he'd noticed about his icynene job and our crew definitely did these things better. When it came time for them to leave, though, they found that they were stuck in the big snow pile out front and couldn't get out, Then their truck ran out of gas. They had to call out the boss with his truck to refuel and pull them out.
Paul Kingery, our plumber, got started before Christmas with the drain system. He's doing that part, and will design the supply side. I will install the supply side myself. Paul works in Des Moines as the plumber for Mercy Hospital and side-lights other projects. As a result, he doesn't have an inventory of parts in a truck, so the day he showed up he had boxes of stuff he'd just bought at Menards. He said he'd use what he needed and we could then take back what he didn't use. He figured he'd gotten about twice what he needed but didn't want to have to waste time running back and forth. As it turned out, his guess was pretty close to right, just about half (in terms of dollars) went back. The receipt from Menards was nine feet long. I sent Tigon and Ben to do the return and told them they could take a 10% restocking fee for their trouble. It worked out for all of us. Paul was able to work out the venting so that we only had to make one hole in the roof.
Also just before Christmas, Scott from Kapaun & Brown started getting our HVAC system installed. They brought in the 'furnace' and water heater, laid out most of the ducting, cut lots of holes for registers, and installed some of the ducting. It looks like it will be a very clean installation. The system we selected is kind of unique (what else?). It uses a high-efficiency water heater to generate heat, then pumps hot water through a coil in an air handler. The air handler also includes a 'heat recovery ventilator' which is a device that brings fresh air in from the outside and exhaust stale indoor air. A ventilator is required on houses as tightly built as ours. I like using hot water as our heat source because it is very flexible when it comes to fuel choices. Today I can use LP, but in the future if I want to heat with bio mass, pellets, or whatever, I just need to have a way to heat water. Since it's easy to move water around, I can pump it from wherever I heat it to the air handler. We'll see how it works. The folks who installed our icynene insulation use this type of system to heat their office building and shop and they love it.
Mike and I finished up the last of the 'planned' interior walls on the first floor New Year's day. I say 'planned' walls because Lisa and I left the kitchen /dining room wall as a design on the fly activity. This evening we went out and used C-clamps, cardboard, sawhorses and 2x4s to mock up a design. We'll take a fresh look at it in the morning. I think the crowning piece of mockery was the 5 gallon detergent bucket and rope standing in for the dining room light fixture! Pictures will be taken in the morning.
Lots to report on since I wrote last time. The HVAC crew has been in and out and they're getting close to being finished. Scott said they'd be done by the end of this coming week. Not that we're in a hurry. I think they're doing a nice job. I've been able to stick my nose in from time to time and suggest a few things here and there. I'm probably annoying them, but they're polite about it. And, when they have questions they don't have to wait for the contractor to answer them. For instance, as they got into the job they found a few register locations that were causing problems with structural members, so we were able to figure out better solutions. Also, I feel like I have a pretty good understanding of how and why my system works.
On a humorous note, I had to call Paul the plumber back because we'd both overlooked the fact that he hadn't plumbed in the main floor bathroom. I'm not sure how it happened, perhaps because he was storing his tools in there, but at any rate, he came back out and finished it up this last Saturday. About the only bad part of whole affair was that he had to do another test of the system which meant another hundred gallons of water or so. No leaks!
We got the kitchen/dining room wall designed and built. I think we're going to like it a lot. The kitchen is quite open to the dining room, so people sitting at the table (me) can easily converse with the person preparing the food (Lisa). On the other hand, the height of the opening is such that anyone sitting in the dining or living rooms can't see dirty dishes on the counters. It also affords the kitchen a great view out the dining room and conversation area windows and a nice view of the fireplace in the living room. I was able to incorporate the cold air return into the design nicely so that you'll never even realize it's there.
We also got the HVAC supply ducting all enclosed. That came out very nicely, I thought.
Martin Stuart (a good friend/near relative), who is a licensed electrician in the Twin Cities has agreed to help us through the wiring of the house. With his excellent guidance we have gotten a whole lot done on that front recently. It has really put us miles ahead of where we'd be if I'd had to buy books and study for hours to figure it all out. He has been so generous with his time.
Mike is very enthused about wiring and has been helping me all weekend. This afternoon when we actually started pulling wire he was a huge help. We got all the electrical wire pulled for two of the bedrooms. For rank amateurs I thought we did pretty well. We figured out a good system for pulling wires through the exterior wall panels. Each panel has a chase cut in the foam for wires, but if the run crosses a panel joint it is hard to push wire through (it gets caught). So we used a vacuum cleaner to suck a thread with a small ball of Styrofoam tied on it. The thread is tied to a stronger string, which can then have a wire hooked over it to pull. When it works really well, it take about 2 minutes to pull a wire. There are times, though, when things don't work so well. Some of the vertical chases seem to have obstructions that give us fits. I suspect it's splinters from drilling the holes in the top plates. In those cases we have more fussing around to do, but so far we haven't had to give up on one. I was also pleased, after talking with Martin, to see that I really only needed to come down the vertical once, then just across the horizontal for everything in a room (I thought I might have to split things up more).
In the north bedroom we go into a bit of rough because when we'd installed the panels we hadn't drilled the connecting hole between the panels at the corner (Enercept didn't do those for us for some reason). So we had to go up and over the corner, which wasn't a huge problem except that one of the vertical chases had a nasty obstruction. We finally got past it by just pushing the wire harder. Still, we tried all sorts of other things first, but in the end it was brute force that won out.
At the rate we're going, it won't be long before we're going to have to make those lighting decisions that we've been putting off for so long.
"Let there be light!" We've just finished a really productive weekend of electrical work. Martin came down from Minneapolis to help, and we had a good crew of local helpers, too. Perry was here for a good chunk of Saturday, and Mike's friend Coda was here almost all Saturday. Plus Dad got back into the act, and Lisa chipped in a fair bit, too, especially with taking care of all the workers.
Since I last wrote we've been doing some of the grunt-work of wiring and making lots of decisions about what we wanted where for lights. Mike and I continued to improve on our systems for pulling wire through the panel chases. We found that the quickest technique was to use a fish-tape (which is a narrow strip of metal like a measuring tape, only stiffer). If the tape got stuck, we could often just try it from the other end and it would go through. But every once in a while we'd have to use the vacuum and ball approach.
Friday Dad came out and with Mike put in a long, heavy wire running from the garage breaker panel to the meter box on the house. This will serve as our temporary power from now on. It will supply a lot of power and can stay there until spring when we have the utility hook up the real main service. Despite having to make an unexpected run to Lowes, they got the job done very quickly. After work, I was able to join them and we got the really heavy wires run from the meter box to the panel inside the house. It was hard to bend them around the two 90 degree turns they have to make, but we got it, thanks mostly to Mike's finesse and Dad's pulling.
Martin showed up at 6:45 Saturday morning for breakfast. We got started working a short time later. Martin worked on getting the temporary service line hooked up and then tackled the difficult job of getting the main cables from the meter to the panel actually hooked into the correct slots and bolted down. This is a hard job because the cable is so thick that it is hard to bend, especially when it's cold--and it was cold. At the same time he was giving us directions on what we could do with running more wires for increasingly complicated parts of the system.
With all the help we had on Saturday, the house was full of the sounds of people working and shouting. Everybody's favorite word seemed to be "Martin!" We avoided any serious mistakes, everybody learned something new, and I think we all enjoyed the days work. By mid-afternoon Martin had the first circuits powered up and we had lights on and an outlet or two.
Mike and Coda got a terrific opportunity to learn about electricity. Martin is an excellent instructor and got along well with both of them. He has a good way with kids and seems to know how to correct them without turning them off. He is also quick to praise good work. I think his teasing sense of humor helps alot, too.
By the end of the day we all knew that 14/3 wire really has four wires in it, and 14/2 has three; that a 3-way switch involves two switches, and that single phase power has two phases. I don't think electricians can count. Oh, and wire gages go down as wires get bigger, until you reach really big wires at zero, where they clearly ran out of positive numbers but didn't see fit to go negative, so they call them double-aught and so forth. Is there no logic in this world? We also learned a lot that did make sense, like the correct way to put wire nuts on, how to 'pig-tail' receptacle box, that hot wires come in to the bottom of boxes and switched wires go out the top, and the two ways to wire a 3-way switch.
Saturday evening we had a fine lasagna dinner with Martin, Coda and Perry as our guests. We briefly considered going to a movie but decided we were all too tired for that. After dinner we put in another hour or so of work, then came in to visit before calling it a day. Sunday, Martin showed up bright and early again and after breakfast got right down to work. He spent a fair bit of time walking me through all the 'hooking up' he'd done the day before so that I'd understand it and be able to finish up the job. I have to admit that while I understand how it works on paper, actually looking at a 3 gang switch box full of wires is pretty intimidating.
Martin said goodbye about noon and headed home. I can't say how grateful we are for his help.
This afternoon I spent a couple more hours in the house, all by myself, labeling all the wires we hadn't labeled before, and hooking up wires in one of the complicated switch boxes. I took my time and thought through it like Martin had told me and it all started to make much more sense. A little hands-on practice makes a big difference.
The other thing that's gotten done since I last wrote is that the HVAC guys finished up. We're just waiting to get an LP tank installed so we have gas to run it on. Then we'll have easy heat and lots of it. That will definitely be nice.
The next couple of weeks will probably be more wiring work as we keep doing the repetitive work of wiring outlets and lights and bringing circuits on-line one at a time. Hopefully by then our plumber will be back at work putting in the supply plumbing and we'll start to consider sheet-rock!
Wow, it's been well over a month since I last wrote! Time certainly has gotten the upper hand on me. Over the past month we've been installing all the mechanical systems that go inside the walls: electrical, plumbing, telephone, networking, TV, speaker wire, and central vacuum. We've also been working our way through a long list of other jobs that need to be done before we can start dry walling. We are essentially done with all these jobs now, and will start dry walling either this weekend or next week.
After Martin got us off to such a good start with the electrical, we were able to keep plugging away at it. We pulled at least 3,000 feet of wire, put in 202 boxes. One electrician quoted me a price of around $42/box, so that would have been $8,484. We've spent a lot on supplies, but nothing like that! On the other hand, I would begrudge somebody that kind of money to do this job. It's hard work that tears up your hands.
We didn't have many problems with our wiring. We had one circuit short because of a wire pinched in a Romex clamp, and one of the fancy AFCI breakers kept tripping, apparently because of a slightly loose wire nut. Then there was my good one where I accidently wired two hot wires together that were on opposite phases, so I had a 220 volt dead short. A few sparks flew in the panel when I turned that on! It was kind of fun to track down though, because neither circuit would indicate a short in the conventional way (hot to neutral). It wasn't until I tried to energize the circuit a second time and did it in reverse order that I realized what was going on. On that same circuit I'd also overlooked one outlet box and left it un-made, so the light at the end of the run wasn't coming on. That was a fun morning. All-in-all, though, I think we've been pretty successful at getting this place powered up.
Mike has been very energetic about helping with almost any job. He was getting pretty tired of making up electrical boxes for a while, but he did a few more recently when I needed him to. He's taking great satisfaction in crossing things off the list. What an education he's getting!
During the last month, Paul the plumber, has been in putting in our water supply system. He used Pex tubing for the main runs, which is flexible plastic tubing. The advantage of this type of tubing is that it is quicker to install than conventional rigid plastic or cooper pipe, it provides some degree of insulation that cooper doesn't, and because there are fewer joints and sharp turns, there is less frictional loss in the system, meaning better pressure at the tap. Knowing that we are a long way from the road and have flow problems in our current house, Paul was very conscious of the need to make our new system as tolerant of low pressure as possible.
The water system is a manifold design where each room has it's own supply lines coming from a central distribution panel. This helps avoid the old problems associated with multiple people using water at the same time like pressure drops and temperature swings. It also makes the system easy to work on because you can shut off each room at the manifold.
Because we may need to run the water heater at a higher than normal temperature setting to support the furnace, Paul put in a temperature control valve to ensure we don't get scalding hot water out our faucets. We had the idea, too, to tap hot water off before this valve for the clothes washer and dish washer, so they could benefit from the extra hot water. He also installed a hot water re circulating system so we won't have to wait for hot water. Finally, he set up our cold water supply so that we had our outside faucets and one faucet downstairs tapped off early in the line so if we ever need to treat out water we'll have a source of untreated water for plants and outside.
Yesterday, we charged up the system with water for the first time. Paul said there's always at least one leak, and sure enough there was one. But only one. He fixed that and nothing has leaked since. We will get connected to the water main in the next few weeks.
The heating system is now working and doing a fine job of making life comfortable for us, but not without a major disaster, first. Paul and I got impatient waiting for heat, and since we had the propane hooked up and Paul had the water heater hooked up, we figured we might as well start the furnace. We figured the worst that could happen was that it wouldn't work and we'd just leave it. Well, it didn't work, in retrospect because one of the thermostat wires wasn't connected. What none of us realized was that because the furnace is connect directly to the outside for fresh air, there is cold air tumbling down the fresh air supply duct into the furnace. As a result of this, and probably assisted by a very strong south wind, the furnace core froze and was completely destroyed. We've all gone over this again and again in our heads and I think it's fair to say that there's blame enough for all of us. Fortunately, our HVAC contractor was excellent about fixing the system and had it up and running a week and half later. I'm not convinced that this same problem won't happen if we have an extended power outage, so I've asked the HVAC folks to come up a fail-safe way to close down the outside air exchange if the blower isn't running.
The house is holding heat really well and absorbing sun magnificently. On sunny days the furnace doesn't run at all and the temperature actually climbs. One day when it was in the 40s outside, we watched at the inside temp. climbed from 68 to 72 without the furnace coming on. Vertically, there is some difference between the first floor and the cupola, but only about 3 degrees. I don't have any data on fuel use at this point, but I think it is probably pretty light.
We pulled telephone and network (CAT-5) wiring throughout the house. Two in each bedroom, four in the office, and several on the main floor. We went though a whole 1,000 foot box of CAT-5 and still need about a 100 feet more. We will probably install a phone system like Dad has had (in fact, we may use Dad's system as he isn't using it any more).
I got some good advice about TV and audio stuff from David Stuart and Roy at Roy's T. V. We put speaker wire in the walls and ceiling so that we could have five speaker surround sound in the family room and background music speakers in the living, dining, and kitchen. We also put coax in every bedroom and a line from the attic down to the family room for an antenna hook-up.
Besides wiring jobs, we did some more carpentry. Lisa and I finally figured out what we wanted to do with the 'conversation area.' The best way to describe it is to just look at the pictures. What was really interesting about this was the way we came to this design. Lisa and I couldn't come up with anything, so we decided to mock-up some ideas. Did one mock-up and neither of us liked it much, so Lisa did one and we like that a lot better. We then bounced refinements off each other for several hours until it all clicked. Adding to the fun was that Lisa hung out and helped me build it. I've taken to calling this the 'observatory' since I think it will be used to observe the goings on outside. So for, that's what happening. We also built a little alcove at the east end of the family room for books and the audio/video equipment.
Another system to go in was the piping for the central vacuum. That was kind of fun. We all worked together on this. Mike did most of the gluing of pipe. We will have two connections on each floor which will give us complete access to the whole house. We will also have to 'vac pans' which are basically vacuum dust pans. They're little slots along the floor where you can just sweep your dust into and it gets sucked away.
Beyond major things, there have been a host of minor projects (or not so minor projects) like hooking up bathroom vents, shimming framing in preparation for drywall, foaming around outlet boxes, doorbell wires, and on and on. I've probably missed describing a few things here, but I think this covers the high points.
Has anybody else noticed that it seems to be getting longer and longer between times I write? I wonder why that happens?
At some point not long after I last wrote we finally closed out the "to do before drywall" list. I decided to take a couple of days off from work to get the drywall underway. There was some advantages in trying to get a certain amount of the work done quickly. First, accepting delivery of a house worth of drywall is a pretty daunting task. Second, I rented a drywall hoist for doing the ceilings, and since that makes time equal money, it was worthwhile to make that part go quickly.
We scheduled our delivery for the first Monday of spring break. Mike invited several of his buddies over to help, plus we had the good services of Perry and Russ. Tigon was home, too. To complicate matters just a bit, it snowed...a lot.
Even before the drywall truck arrived, things were getting interesting. Ken Wiggers came out to do a blower door test to help us see how air tight our new building was. He needed a calm morning and it was calm. That was an interesting process, although the results were somewhat disappointing. Our house is much tighter than Energy Star standards, but those standards are widely regarded as not very good. We were able to look around with his infrared camera to see where cold air was coming in, and we found that we had lots of little leaks in the seams between the SIP panels. I know we caulked these very thoroughly, so I can only imagine that some of the joints were not caulked on the factory side. I should do some forensics on this before we put the drywall on the exterior walls.
Anyway, shortly after Ken left, Russ showed up, and then the boom truck wth the drywall. Then Perry pulled in, and Mike got back from picking up his friends and the drywall lift. Everything was all set. By this point, though, it was really snowing heavily. Eventually we would wind up with 4-6 inches of heavy, wet snow on the ground.
The boom truck was able to lift about 30 sheets at a time of drywall up to the north window on the second floor. From there, we slid them in the window and distributed them around to each room according a plan we'd developed. Of course, the plan didn't work out quite right as we discovered that our deliver didn't match what I thought I'd ordered. I had revised my order on Friday and I don't think the revision got through. Oh well. The hardest sheets to get in where the 12 foot long 5/8 inch ceiling stuff. Those were all two man jobs. Fortunately there were only about 60 sheets of this! The 8 foot wall sheets were a relatively easy one man job for some of us.
In all, it took us about 2 hours to unload 300 sheets of drywall, plus various other supplies like 15 5 gallon buckets of mud (ugh). The snow made a mess of the floor and got a lot of the drywall wet, but it all dried out. Most of the crew took off, one of Mike's friends hung around to help starting hanging after lunch.
Unfortunately, when we wanted to get started hanging, we discovered that they'd forgotten to deliver the screws! Argh! So I called Munn and Larry drove out in the blizzard to bring us the screws. What a guy.
In the afternoon, we got started putting put ceiling sheets on the second floor. I was pretty rusty and our first few sheets were rather rough, but we eventually got the hang of it. At this point, I don't recall how much we got done that first day, but it didn't seem like much. We were awfully tired. Tuesday we put in a good day with Mike, Dad, and Lisa all working. We got a lot of the second floor ceiling up.
Over the next few days, mostly in the evening, we got the rest of the second floor ceiling done. Friday afternoon, Mike and his friend Coda put up a few sheets in the laundry room. Then Saturday we started the blitz on the first floor in earnest. It turned out to be a whole lot easier than the second floor because the rooms are larger and the ceiling joists are wider, making alignment a lot easier. We were able to put up a few actual whole sheets without cutting. By the end of the day we'd gotten most of the first floor done and easily finished it up on Sunday. We were able to return the hoist Monday morning so we only had a weeks rental (still, $120). Sunday afternoon, Tigon, Mike and I started putting up a the first few wall sheets in the laundry room.
The wall work has been a lot more fun, and easier. Each piece that goes up defines the space a little more, and before long we were really getting a feel for what we'd designed. Fortunately, we liked what we saw!
Drywalling is not a particularly sophisticated operation. There is one nifty tool, called a Roto-zip, which is like a router for cutting holes for outlets and such. It's a bit hard to master because it keeps wanting to wander around as you cut. I practices on some scrap first, but just the same, my first few cuts were pretty bad. I gradually got better, but only after about 50 cuts would I say I was consistently o.k. Even now my average cut is still just a B+. The worst things to cut were the ceiling holes for the heat vents. They don't sit flat against the drywall and they're very flexible so they don't work well as a guide,
This weekend we got into the really tricky job of dry walling the stairway. We had to construct a platform to do the underside of the stairs and the upper portion of the stairway walls. From the platform, we were also able to do the underside of the cupola floor. Sunday, Mike and took the platform down and reconstructed it in the cupola so that we could do the ceiling there. We did a little wiring to install the light box that goes right in the middle of that ceiling (yes, Martin, we are putting that light in).
At some point since I last wrote, we also got our water service brought part way up to the house. Xenia rural water takes their line to within 200 feet of the nearest structure, so they did their work and brought it up about 2/3 of the way from the road. They had a heck of a time down by the road when they hit an old dump site where some previous owner had buried his trash. With the wetness of the ground, they just couldn't get enough stable ground to get down in hold and do their work. In the end, they ran another line about 200 feet north to the neighbor's corn field and hooked up there.
Last night we had a heck of storm blow through. Mike had about eight friends over for a bonfire and they were having a grand old time. Lisa and I were sitting in the driveway watching the lightening off to the west and wondering how much longer the weather would hold. Then, all of a sudden, the wind came up with ferocious speed. The bonfire went horizontal and the newly cultivated fields all around us started blowing across the land like a sand storm. We got the kids into the new house and discovered that we were locked out of the old house (maybe a dog?) with all the windows open. I climbed in through a window and got things shut up, but not before the dirt had covered everything. In the new house, the kids were having a good time riding the storm out, but I was fretting about water leaks that shouldn't have been. The front door was leaking something fierce, but we kind of knew it would since we hadn't put in all the weather stripping stuff yet. However, the most troubling thing was that the two windows on the north side of the house were leaking. The problem was something inside the window itself because the leak was coming under the sash. That was very disappointing since I thought we'd gotten good quality windows. Later we learned that they'd clocked the wind at 70 MPH at the Ames airport.
(Later in the week)I called Pella to come out and see what was up with our windows. Lisa and I had done a controlled test the day after the storm and conclusively determined that the problem occurred when water hit the corner of the window, causing it to "pile up" and just flood over the sill. The windows aren't designed to be submersible, the assumption is you'll never have a large enough volume of water at a high enough pressure to overcome gravity. But it did happen to us. Anyway, the Pella technician was very helpful and tried several things. I stood out there with a garden hose testing them. Eventually he tried something that didn't seem like it would work but it did. He put in "booster springs." These are just little pieces of spring steel that provide added pressure between the tracks and the edge of the window sash. It seems to have fixed the problem because I can no longer get water to come through using my garden hose test. He will install booster springs in all the windows in a couple of weeks when he gets more.
This weekend I went on my quest to make the house as air tight as reasonably possible. I've had Ken Wiggers of Prairie Foam Insulators come up twice and do blower door tests. The first test results were o.k., but could have been better. After caulking all the panel seams, we had him come back and do another test. The results were a little better, but still not as good as I would have liked. We could detect many small leaks around the windows and some bigger ones inside the fireplace enclosure.
Dad and I were trying to work out a way to set up our own blower door, but when I talked to Ken again, he offered to let us borrow his set up. Not only that, but he brought it up since he was coming into Ames anyway. There are some pictures of the blower door in the picture gallery.
The procedure is relatively simple. We set up the "door" and crank up the fan. Using a digital pressure meter, we can determine how much air is being sucked through the fan. With that number as a benchmark, we can then begin to search for the leaks and seal them up. We had three major sources of leaks: planned openings such as bathroom fans, water heater flue, and so forth; the gap between the window jambs and the framing; and, as mentioned above, the panel seams.
Clearly, any planned opening in the building needs to be sealed up in some way so you can concentrate on the unplanned leaks. You'd be surprised at how many of these planned openings there are. It wasn't until Sunday afternoon that I realized I'd been pulling air in through the sump pit drain! I wouldn't have thought that much air would make it through the 6 inches of dirt at the outlet end of the pipe, but I could definitely feel air moving.
Tigon and Lisa had spent several days caulking the panel seams prior to our second test, which was worthwhile work even if it didn't make a huge difference in our test results. Any leak could create condensation problems, which lead to mold problems. I spent Saturday afternoon and Sunday carefully putting additional expanding foam around all the windows. The biggest source of trouble was the tar paper we used under the siding. I followed the directions in my construction book and wrapped the tar paper around the window opening and inside the house. Unfortunately what happens then is that you can only foam on one side of that tar paper and there's virtually no seal between the other side and the framing members. I was able to work foam in lots of place and smear it around others. I stopped every so often as I worked and checked the air flow with the pressure meter and saw I was making progress, which spurred me to keep at it.
In the end, we were able to reduce our ACH50 (air changes per hour at 50 pascals pressure) from 1.23 to .76. That's almost a 40% reduction. For those of you who are interested, ACH50 is a fairly standard measure of air infiltration. As a rough guide, divide the ACH50 number by 20 to determine the natural infiltration rate which is what the house will experience under "natural" conditions. In reality, the actual infiltration rate will vary considerably depending on temperature and wind. After taking a thorough set of measurements at about 10 different pressures I was able to have Ken use his software to more analytically determine our natural infiltration rate, which is now about .07 air changes per hour. This is a very low rate of infiltration, so I am happy. When you work this hard to build a house, you want it to be good!
We spent the weekend dry walling some more. Since we've gotten the air leaks taken care of, we started putting up drywall on the outside walls. I thought it would go very quickly, but I got a slow start Saturday morning and we didn't really push too hard. Sunday, we got more done. Dad helped again, in the morning, then Mike came out and relieved him. Mike and I had a good day working together. We got most of the basement walls and the stairway done. Yes, you can get a 4 x 10 foot sheet of drywall down those stairs. 4 x 8 sheets are easy. Mike went off to help Tigon unload stuff from the car and I was able to get the last four pieces up in the living room, including what had to have been the most complicated piece to cut in the entire house. I've seen simpler jigsaw puzzles.
I felt pretty satisfied with the weekend's work. I was hoping to get the second floor done, too, but I'll tackle that this week in the evenings. Soon we should be able to start working on the porch.
Last week the electric company came out to trench in the line for our service. Today they came out to hook it up. They had to replace the transformer on our pole, but it only took them an hour to do the whole job, so it wasn't a hardship-- I was on a conference call anyhow.
Saturday, Bill Harleen came out to trench in the water line, so we now have water to the new house, which is really handy for water the grass that Lisa planted. Between the low pressure at the old house and the long hose needed to get over there, watering was a slow job. Now it's much nicer. Bill is also doing our septic system and so while he was out he put in the sewer line from the house to where the tanks are going to be. He'll come back later to put in the tanks and the field, but this lets us get on with the porch work.
Hopefully I can get the Co-op to come out and trench in the propane line and the phone company to do the same with their phone lines. They have to cross each other, so I don't know what the best way to coordinate this will be. We'll probably have several more visits from the locator crews.
Last week we had a surprise visit from Dale Travis, author of a web site devoted to round barns and other interesting buildings. I'd corresponded with him briefly, but I had no idea he was travelling through. I gave him a quick tour of the house, and he took some pictures. Dale's site is www.dalejtravis.com.
Most all of the drywall is now up. There are a few places remaining that I can't get until I take down the scaffolding in the cupola. I've got the hard to reach stuff in the cupola all mudded pending one more inspection.
The Co-op did come out and hook up our gas line. That was the last of major underground work. We don't have phone in yet, but Qwest isn't working at light speed, so if they get here before the porch goes up, we can trench right up to the house, otherwise I'll just run a conduit from the house to the end of the porch.
The big news is that this weekend we got the porch footings dug and the first load of concrete put in. A really major thank you goes to our new neighbor and his wife, Jim and Teresa Palensky. Jim brought his tractor over with a huge 24 inch post hole digger. Jim had had this auger made up specially for planting trees, not really intending to use it for deep work. But since we needed to dig some big, deep holes for the footings for the porch, it turned out to be just the ticket!
Saturday afternoon we got started and immediately broke a sheer pin in the PTO drive shaft. We made a run to Boone to get a replacement. I figured that we'd need at least three hours of work to get these holes dug. After all, there are 16 holes to punch. Figure just 10 minutes per hole and already you're almost at 3 hours and that assumes nothing goes wrong.
When we got back and replaced the pin, Jim was able to get the first hole dug but it banged his tractor around a whole lot and the hole was less than perfect. However, on the second hole he discovered a better technique and drilled a nice 4 foot by 2 foot hole without too much tossing about. By the third hole he really had it figured. Before long, we were half way around the house and I was frankly amazed at how quickly it was going.
We finished up the last hole just as a few sprinkles started coming down. Teresa had brought pizza and chicken and beer, so we gladly stopped and ate. We had a nice visit and enjoyed watching their three little kids run around the house and have fun.
While I had hoped that we would get all the holes dug in one day, I was prepared to be frustrated and have things go wrong. Instead, everything went really well and we finished up early. Such a deal!
Sunday Mike, Tigon, and I spent an hour or so cleaning the loose dirt out of the bottom of the holes. With all of us sharing the work it went quickly and nobody got too tired. Tigon accompanied me to Lowes to get re-rod and forms and other stuff we needed. When we got back, Mike was sweeping out the garage. I cut up the re-rod, then Mike and I carefully laid out the porch line and put in our marking stakes. We then positioned re-rod in each hole so that it would be right where our final above-ground footings would protrude.
There were two holes that when we tried to get the re-rod where we wanted it, it became clear the hole was off enough to cause trouble. So, we got in with the shovel and enlarged them enough to make them right. That was hard work, especially with the howling wind we had that kept blowing the dirt back at us. Still, with good team work we got the job done and were ready for concrete to be poured.
This morning, I called ISU Ready Mix for concrete. They were having a slow day and so could deliver any time I needed it. Since it was threatening rain, I figured I might as well get it done early, so I asked for 10:00. I called David Stuart to come over to help because I wasn't sure how close the truck would be able to get to some of the holes in the back, and I wanted to make sure that if we had to use wheel barrows to move several holes worth of concrete that we had a couple of strong hands.
As it turned out, the driver was able to get his truck within range of all but one of the holes, so we had minimal barrow work to do. But, it was still nice to see David.
The pour went really smoothly. I ordered enough concrete, but not much extra. The re-rod mostly stayed where we'd put it. By noon we were completely done and Lisa and I had a few minutes to just sit and appreciate how well the whole thing had gone.
The next job will be to put in the tubular forms that will form the above ground part of the porch foundation. We'll get these all positioned, then backfill around them with dirt to hold the form in place. That way when we pour the rest of the concrete we won't be struggling with forms sliding about.
I'm really looking forward to framing the porch and seeing the final exterior shape of the house come into being. I'm also looking forward to covering up the tar paper that I've been looking at all winter. When we started building last year, Lisa asked that I at least try not to leave OSB visible throughout the winter that she'd have to look at. I managed to achive that goal, but for my money the tar paper was much uglier! Soon all sorts of fun things start happening on the house: laying stone around the fireplace, painting inside and out, wood work cabinets, doors, fixtures, floor coverings...some day maybe we'll even get to move in. Here's hoping!
This may be the longest hiatus I've taken from writing this journal since its beginning one year and a few days ago. I should feel guilty about this, but instead I just feel a little sad that I will surely miss recording some interesting parts of the story.
I left off in May writing about how I was looking forward to framing the porch, and seeing the final shape of the house come into view. At the time I thought it would take a few weekends to do the floor, then a couple more to do the roof. This has proven to be a gross under estimate. Right now, we have almost finished the floor. We will have it done by the end of this week. I have not been putting in nearly as much time as I had previously, mainly because I am spending more time doing my day job, after having enjoyed the generosity of my employer for far too long.
Since May we have been framing the porch and laying flooring, as well as mudding drywall. The porch framing was interesting since we were building a concentric octagon around the existing one. In retrospect I see now that I should have done the layout differently, but by being careful and more than my usual share of good luck, we got it pretty darned close. The main layout problem is in accurately locating the eight corners. I did it by laying out lines parallel to the walls of the house and finding their intersections. This approach is fine for small scale work such as you might do in Geometry class, but for something as large as a house, the level of error involved turned out to be greater than I would have liked. In hindsight I see that I should have taken diagonal measurements from the adjacent corners of the house to find the included corner's location. Further, I should have just calculated the distance from the house corner to the porch corner. These two methods, taken together, would have precisely located each corner to within a small fraction of an inch. As we did it, we got several of the corners dead on, a few off by 1/4 or 1/2 inch. Two were off my around 3/4 inch. You wouldn't think that would be a problem, but consider this: when we went to layout the porch flooring, we were going to try to make eight perfectly aligned miter joints. Now when I'm building a piece of furniture in the shop that uses a miter, I know that I have to be exceptionally careful to get both the lengths and the angles correct or the miters won't line up at the tips. The larger the miter, the more careful I have to be. Furniture miters might be a couple of inches long. Now realize that the miters on the porch floor at 98 inches long. The tiniest error in the angle can lead to a huge error at the point. For example, a 1 degree error in the angle leads to the point being off-line by 1 3/4 inches! My failure to understand the simple fact of geometry has cost me a lot of head-scratching. Fortunately, we did manage to get it darned close, and I have some techniques in mind to conceal whatever error there is. When you come visit, see if you can find it!
As usual, Dad was out helping a lot with most phases of this project. I really enjoy having him around. Mike, too, has been right in there for a whole lot it. And Lisa and Tigon pitched in on the framing at several crucial times when extra hands or just encouragement were needed.
We framed the porch with pressure treated lumber. I had originally wanted to use a composite post for the vertical supports, but when we tried to cut them we realized that it would be impossible to do the complex notches we needed in the hard material. The posts we got were made from recycled cars and they looked like it! Embedded in the hard plastic were identifiable pieces of ceramic and wiring. We pulled a wire plug out of one. After struggling with these posts for a short while, we pretty quickly decided to revert to using pressure treated 6x6 posts. That was a good decision. Since each post sits on a 1 inch high plastic pad, and that on concrete, I don't expect problems with rot, ever.
The post notching was quite an involved operation. If you visualize how two beams will meet at a 45 degree angle, then set them into a notch on a post, you can see that the faces of the notch need to be at 45 degree angles to each other. It's a good thing we have a workshop close at hand. We used the table saw, the band saw, and a hand chisel. Once we got ramped up, we got all eight corners done in an hour or two. We also had to do a simple notch for the middle posts, but by comparison, those aren't very interesting.
Since we knew that we wanted the outside edge of the porch to be the same distance from the house all the way around, we would cut the joists for the floor all the same length and use them to gauge the position of the outer beam and posts. This theory worked well for the middle posts, since they stood directly out from the middle of each wall, but failed us for the corner posts, again because we didn't have any good reference point. And there's where one of my stupid mistakes occurred: I trusted that my beams were reasonably straight from the last "standard joist" to the location where the corner should be. Of course, lumber isn't that straight, especially pressure treated lumber, and I was too inexperienced to consider this and double check it as we went. As a result, our corner post positions varied, both in their distance from the house corner, and, consequently, in their angle relative the house walls. If there's one thing that I'd do differently on my next house, it would be to constantly check and recheck the layout of any large scale dimension. If you're off a little on a short dimension, it's not such a big deal, but to be off on a large member just kills you later in having to make up for it because you can't assume you're working from a good base anymore.
We hung the joists on hangers nailed into the rim board. I had Tigon put some scrap 45 mil. rubber over the rim board on the sides where we'll have uncovered deck to add a layer of protection from water and snow. I don't know if it's necessary, but we had the rubber and Larry at Munn's said that aluminum flashing was not compatible with the new chemicals used in pressure treated lumber. He said the new flashing was, you guessed it, rubber. Dad made a clever positioning jig for putting the hangers in the right location vertically, and holding them closed as we nailed them. It worked nicely, although I still found that I was getting some variation in position that I couldn't really explain. I'm fairly certain it came from movement caused by the driving of the nails, but I had a hard time observing this. In the end, it wasn't a serious problem. I put shims in the bottoms of a few hangers to raise up the joists a bit and that took care of it.
I made the corner joists doubles to get more nailing surface for the flooring, and because there is one other joist that has to hang off the corner one (see the picture if this doesn't make sense, some day I should draw some illustrations to accompany this text). I used big lag screws to attach blocks to the rim boards which made a little "shelf" to set the house end of the corner joists on. The outer end just rested on the posts. Then I used some angled steel connecting plates to attach the shorter straight joists to the corner joist. I think it is a very satisfactory way of framing this.
One of the challenges with the porch was the fact that along the north and north-east sides of the house, the difference in height between the foundation and the surrounding grade was too short to allow for the joists to sit on top of the outer beam, so they had to have joist hangers on the beam. I had planned for this one, though Dad kept grousing about it like it was some kind of mistake. Really, Dad, we didn't want the house to sit up out of the ground any more than it absolutely had to. It didn't really create a problem, except that any time you have to do something differently than the other zillion times you do it, it slows you down and makes you have to rethink things.
While this framing was going on, I was also shopping around for the flooring to use. The best advice I got from a number of sources was to use Southern Yellow Pine, and treat it on all six sides with a good waterproofer. Munn doesn't carry Southern Yellow Pine tongue and groove (T&G) flooring, they carry fir. But when I went to order, they didn't have enough fir in stock, so they found a supplier for SYP and got that. Either way, the stuff is terribly expensive. My indoor flooring won't cost as much! But imagine 16 foot long pieces of clear, vertical grain pine. Pretty wood and very nice to work with. This is the stuff the old porches that are still around are made from. It is the hardest of the soft woods and among the most rot resistant. We had about a two week lead-time to get the wood in, on top of which Munn failed to call me to tell me it was in, so we missed a weekend's work because of that, too.
While we waited for the wood to show up, we went back to mudding drywall. Pretty good progress. Lisa and Tigon and even Mike continued their assault on the main rooms, while I dinked around doing all the hard reach bits in the cupola and the stair way. Everybody (yes, absolutely everybody in the whole world) has told us we're crazy for doing the drywall ourselves. We probably are, but then again we were probably crazy for building our own house and such a strange one at that, so we don't care. Doing this part of the job is one part stubbornness, one part frugality, and one part pridefulness. Besides which, drywall can cover the sins of the framer (a little shim here, a little shim there, hey, it's square now!). While this was going on, a few people commented on how there were no updates to the web site. My answer was, "So, you want to see pictures with captions like: 'Here's Lisa mudding' and 'Here's Lisa mudding some more' and 'Here's Lisa mudding again'...you get the idea. Anyway, that was my excuse for a while.
As we've been mudding we've been working on perfecting our techniques. I'm sure the guys who do this for a living would laugh at how slow we are, but we are managing to do relatively little sanding. The key seems to be in feathering out the top coats just as far as possible until you pretty much put a coat of mud over the entire wall. Then you don't have those undulations at the seams and you don't have to sand much.
Once the wood for the porch floor arrived, we shifted back into porch mode. The first order of business was to treat all six sides of each board with Penofin, which is supposed to be the best treatment for outdoor wood. I was planning on dipping each piece in a trough made from gutter material, but Lisa suggested that spraying might be faster if we were to make a big stack and spray all edges at once. This sounded like a good plan and, indeed, it worked out well. We could make stack of boards that was about 18 inches high, walk around it with a garden sprayer and apply the Penofin quickly. We then spread the boards out flat on the ground and sprayed one face, then flipped them over and sprayed the other face. Finally, we took each piece and set it on edge to drain and dry. To keep them on edge, and improve air flow, we set them on several rows of boards, the middle one of which had screws in it every few inches to help keep the flooring from tipping over. All this worked very nicely and we treated half the boards one morning and the other half the following morning (we ran out of room in the garage or we would have done them all in one day). We then stacked the flooring back on the porch framing and cleaned up the plastic that covered the garage floor. As you can imagine, there was a lot of over spray, so we did stain the concrete floor some, and we got a few other things dirty. Nothing lost, though.
Some place in there Dad and I took a trip down to The Woodsmith Store in Des Moines to shop for tools. I was going mainly to look for a router for building the columns and all the millwork I'm planning, and secondarily a finish nailer. I had in the back of my mind to look at miter saws but wasn't really planning on buying one. Well, we spent a long time down there and had the assistance of a very able salesman who clearly knew his stuff. I did buy a new router (a Porter-Cable), I didn't buy a nailer because they don't carry much of a selection and didn't have the ones I was interested in, and I did buy a very nice sliding compound miter saw. After having used it extensively on the flooring and decking, I wish I'd gotten one of these a year ago. It is such a nice piece of work and so handy and accurate. It would have sped up a lot of jobs and been easier to use than the radial arm saw. B.t.w., I got a Makita 10". Very nice tool. Lots of $$. I went home poorer by a lot. I have a very understanding wife!
The actual job of putting down the porch flooring coincided nicely with the arrival of Chuck (my brother from Australia) and Kathy and Steve (my sister from German and her fiance). Chuck and Steve pitched in to help, and along with Dad and Mike got the job done in a few relatively painless days. None of us had ever put down tongue and groove flooring before, but it's a fairly easy process. The biggest challenge by far was making efficient use of the material. With it being so expensive, I didn't want to see foot long scraps being thrown into the trash. We worked diligently at that, and I think we had some fun trying to figure out how to get just the right piece and not have too many joints line up and all. In the end, we had very little scrap and I came out with just one piece left.
It's always fun to work when there are a bunch of people around. Chuck gives me guff about not doing everything in metric, like a civilized country. He's right, of course. Despite Steve's inexperience, he was a great help. He quickly learned how to use an air nailer.
I invented a simple, cheap, and useful tool to help bring warped boards into line. There are commercial tools you can buy, but I just had a vision that all I needed was something I could jam into the dirt and then pull on as a lever against the board. A 2x4 with a piece of scrap re-rod sticking out one end did the trick magnificently. And when we move around to a side of the house where the floor was higher, I just got a longer 2x4! I love a useful, no cost tool. Besides, it saved me a lot of stain pushing and pulling boards into place.
Last weekend I finished up the flooring job, putting on the last pieces at the edges and making a little trim strip for the edge that gives the floor a little "fatter" appearance. The trim strip also gave me a chance to use my new router (oooh!). It looks really nice and we've enjoyed sitting out there already.
This weekend we put the flooring on the south three sides. These are the sides that will be left uncovered as deck. For this we used a composite wood/plastic product called Trex. It is durable, never needs staining, comes in several nice colors, yada, yada. It cuts like wood and we used these funky screws to put it down, which have tiny little heads like finish nails, so once they're in you just push the shaving into the hole on top of the screw, tap it with your hammer, and hole nearly disappears completely! The screws are self tapping, torx drive, and they have an area of reversed thread just under the head to add gripping power in place of a large head. About the only down-side to these screws is that they're as expensive as sin. Six cents each! We went through a hundred dollars worth of screws this weekend. We didn't loose a single one. Still, compared to the alternative, it's not bad, and it sure makes a nice installation.
The process of putting down the Trex was slower than the T&G flooring, surprisingly. The big difference is that it's just a lot slower to put in screws than to blow in nails with an air nailer. We also had to make sure we had a uniform gap both between the boards and between the butt joints. The instructions say that because the boards will expand and contract with temperature, you need to allow 1/16 inch for every 20 degrees F between the installation temperature and the highest expected temperature.
Our experience on the porch sides had taught me not to assume the corner locations were correct, so we did additional measuring to precisely locate everything, and as a result, the boards line up very nicely at the corners. All in all, I think it is a very professional looking installation, especially considering that it isn't a simple one. Everybody pitched in this weekend (except that Mom and Dad are at the lake already). It was a long weekend of hard work, but we had decent weather, good tools and materials, good help and we enjoyed making visible progress. All in all, I'm tired but happy.
A week of vacation at the lake, plus a busy schedule at work has made it a little harder to get work done on the house, but we have managed to make some progress.
Exterior painting: Lisa has gotten most of the outside of the house painted. This is one of those jobs she does as she finds time. It has certainly helped to have the porch floor in place as it makes a nice footing for the ladder. Lisa and Tigon had a big design conference and decided to change our planned trim color scheme. I was skeptical at first, but after seeing it I like it quite a lot.
Drywall mudding: The job that just takes forever. Yes, yes, everybody says we should have hired it out. Well I was just at the dentist and my hygienist says she hired out some of her drywall work a few years back and now it looks terrible compared with the stuff they did themselves. So there! Besides, we're saving a lot money and mudding drywall is really FUN, right? Seriously, if you're going to say that you built your house yourself, I really think you've got to do the drywall work, don't you? I mean the longer the list of exceptions you have, the less convincing is the argument that you really did build the thing. And finally, when it come to covering up any framing mistakes (which, of course, I deny there were any of), who better to do it than the person who made them in the first place?
"Siding" around porch: The one row of siding around the porch skirting really gave us the chance to get decorative and creative. We came up with our "medallion" design after playing with several ideas. Each medallion is a mitered frame with a small panel in the middle, then a beveled octagon glued on. I think they look really nice and put a slightly fancy touch on what has been a little ornamented house so far. It's not like we're going to go all Victorian, but in the end I think it does need just a bit more frill to make it look right. I'm definitely going to jazz up the trim around the doors and probably will put a little beading strip over the corner boards and around the windows.
Building porch columns: The story here is one of economy. If you want octagonal columns, you're either going to pay through the nose or you're going to build them yourself. I had Larry at Munn price columns for me, and he came up with $960 each! Yow! In doing some Internet searching I'd seen that even standard columns were several hundred dollars each, so it wasn't a total shock, but I just had to laugh. So I embarked on building them myself.
I didn't want to use a solid post because it would quickly crack. Cracking might not look too bad if the post was to be stained or left rough in some way, but we want to paint ours, so we need good surfaces that would hold up over time. The logical approach was to build them out of eight pieces, mitered together. So I started looking for a way to miter long pieces of wood accurately and quickly. It didn't take long to find a router bit that would cut a 22.5 degree locked miter (see bit). As you can see, this bit isn't cheap, but a whole lot less than $960 x 17.
The next step was to decide what wood to use. For this I consulted with our friend and professional carpenter Weldon Abarr. He suggested using pressure treated wood that had been kiln dried following the treatment process (so it is dried twice). He cautioned me that it would be difficult to find. If I couldn't find dried pressure treated, then using regular pressure treated would work fine, but I should plan to dry it out before working it. I dutifully engaged in an exhaustive, and exhausting, search for KDAT (kiln dried after treatment) lumber. In the end, it was not difficult to find, it was impossible to find. It does exists, but the only way to get it is to buy a whole "unit" of it, which is 240 16 foot long boards, I only needed 34 boards. In the end, I had to settle for using regular pressure treated. We cut it all to rough length and width, then stacked it with stickers in the new house, put a fan on it, and cranked the air conditioning down to keep the humidly low. After a week, the wood was feeling a lot drier and so we started the joining process.
The first step in joining the column sides was to plane each piece to consistent thickness. Then I routed the female edge of the locked miter. The female side of the joint uses a pretty big router bit that hogs off a lot of wood. It was hard work to keep the wood firmly down on the router table and firmly against the fence in order to get a consistent joint. I made a special push block that allowed me to apply pressure in two directions at once. In retrospect I should have set up a feather board but my first attempts at this weren't giving me the kind of control I wanted in dealing with any warp in the board. I alternated between planing and routing so that my arms wouldn't get too worn out. It took around six hours to get through all the boards. I had started with 145 boards and after this pass I had discarded seven for warp, so I now only had 2 extra.
Cutting the other side of the joint was also a two-step operation. First, I had to run each piece through the table saw to rip it to final width. By this point the wood had been sitting out a while longer and I felt comfortable that it was dimensionally stable enough to be cut to finished width. I did set up a feather board on the table saw which helped me get good, consistent results. Then I had to route the male side of the locked miter. That bit takes off less material, so routing was easier. I also opted to go with a feather board for that operation since I now had very straight wood to work with. Still, running 138 pieces of eight foot stock through a routing process like this is work, so I continued the pattern of alternating routing with ripping. Again, it took about six hours to get it all done.
I was very surprised by how straight the wood was. We had selected the best looking boards from what we ordered, but still, I had expected a pretty high level of warp and twist. As it turned out, we had very, very few boards that were any challenge at all. I'd estimate it at less than 5%. Most were just perfectly straight. After both joints where cut, I re-stacked all the pieces in the kitchen to let them dry out some more while they awaited assembly.
Lisa and I developed a good process for gluing up the columns. We used a band clamp to apply pressure, then wrapped strapping tape around to hold it. Once the strapping tape was on, we could release the clamp and move it along the column 12-18 inches and repeat the process. We found that the regular wood working band clamp would slip as we tightened it down, so we switched to using a hold-down strap. That worked even better because I would apply a little more pressure, and it was easy to release and reposition. Once we got cranked up, I think we were gluing one column every 20 minutes or so. Oh, we cut the tip off the glue bottle so we could apply the glue quickly. It took almost a gallon of glue for the job.
We also built bases and tops for the columns. The bases look like little canisters with lids, and the tops are a reverse version of the lid. The base will give the column a little more finished appearance, plus I think it will make it easier to install the columns because we can locate and anchor the base before setting the column on top of it. Mike was a big help with the assembly-line production of the bases and tops. It was another of those jobs where we had to do the same thing 136 times.
Lisa is working out the details of the landscaping around the house. We are going to have a field stone retaining wall built around about five sides, varying in height from less than two foot to over three feet. The stones will be laid dry and reclined into the dirt so that plants can be placed among them. We got one bid to do this work for over $18,000, and another for under $7,500. We were floored by the 18K bid!.
Lisa has also been studying the "driveway" problem, trying to figure out how best to accommodate parking and turning around. If you've ever been here, you know that it's hard to get a car turned around by the house without driving on grass. The scheme we've settled on is to have a mini parking lot off the driveway so that visitors can pull into a parking stall that is perpendicular to the drive, then back out to go the other way. We haven't decided if we'll make it two or three stalls wide.
I was going to write about how much drywall work there is in a house, but when I look back over the pictures since my last entry I see that I've got a whole lot more to cover.
First, there's the porch. Last time I wrote we were still working on the columns. That went pretty well and we wound up with 17 nice octagonal columns, 17 octagonal bases, and 17 octagonal “hats” as we called them. Dad and I cut them to length using a stop block and a two pass cut technique on the radial arm saw. We sanded them smooth with belt sanders.
We started the framing process by setting the column bases onto the porch decking. Each base was bolted to the decking using a long lag screw and shims to level is (since the desk is slopped for drainage). Once all the bases were set, we could put up columns. We used some homemade scaffold that I'd bought at auction to hold each column in place and plumb while we hoisted the double 2x10 beam into place on top. Each side of the porch involves two sections of beam, joined over the center post. There is about a one foot over lap between the two beams. The first section was a bit tricky since we had to set two columns at the same time. We were able to do that by putting the scaffold in between the two so one section of scaffold could support both columns. Before lifting each beam into place, one end had to be mitered at 22 1/5 degrees and the middle end had to be cut so that one 2x10 was longer than the other, creating a lap joint where to the beam sections meet. Then we placed blobs of glue on the column caps and lifted the beams into place. The first one was a shaky, but we quickly got the hang of it and never even came close to dropping one.
Once we got the beam in place, we could lay in the rafters. These we had pre-cut for the most part. We set a few hangers, measured exact length, cut, and nailed off. There were seven common (normal) rafters on each section, plus the corners. Dad and I got a pretty good rhythm going. At this late date, I don't recall if Mike was involved in this much or not. My main memory is of working with Dad. Part way through we had a nice visit from Phylis and Gerry Smith (old family friends). We enjoyed a nice snack break on the porch, even if we didn't have a roof overhead yet.
Eventually, all the posts and rafters were up and we could start putting plywood on. This was really exciting since it was one of those steps that had a big visual affect. We finally got to see what the finished shape of the house. We were not disappointed! Mike did a lot of the work on this because my heart arrhythmia was really acting up that day I felt out of breath and a bit lightheaded. Dad and I took turns lifting the sheets up to him, and he got them into place and nailed them off. He then trimmed them as needed at the corners. He's a good roof monkey.
Next on the porch was roofing. This was much the same process as we had done on the main roof of the house, only a lot easier because the pieces of metal were smaller, only the corner ones had to be cut, and we could get on and off the roof by climbing out windows. I don't recall exactly how it took, but it seems to me that we did two or more sections per day with two people working. I know Lisa and I did two sections in one day. Mike helped on this, too. I had designed the porch so that the roof metal would be a whole number of feet long, meaning that we could just order the exact size we needed. We left the west side un-roofed until we bricked the chimney.
Bricking the chimney. We settled on a thin-brick product from Cultured Stone for finishing the chimney. This brick is about ½ inch thick and comes in flat and corner pieces. Because it is so thin, you don't need extra foundations to support the weight and it's supposed to be easier to install than real brick. Clearly the first point is true, but the second I'm not so sure of. Never having laid real brick, I can't say for sure, but I think it might not be that much harder. And it wouldn't cost that much more (if anything). On the other hand, if you have an application for this product in a remodeling job or something, then it should be very good. The installation process sounds simple enough. First you nail on a metal lath. But you have to nail the snot out of the stuff (every six inches) so you're nailing for a long, long time. If I'd have had a roofing nailer it wouldn't have been so bad, but doing it by hand took forever. The next step is to apply a base coat of mortar to the lath. Mike was my #1 hod carrier and general helper. He really was by right hand man throughout the process. After the lath coat, each brick had to be moistened, then buttered on the back with mortar. This was Mike's job. Then I'd pick up each brick and place it in position, hopefully straight, plumb and level. Getting the corner bricks true was the key task. If I got those in right, the regular bricks went smoothly. I adopted the technique of setting about six courses of corners, checking each course with a level across to the other corner. Then I could fill in the regular bricks pretty quickly. Looking back though the pictures I see that I haven't mentioned the scaffold I built for this job. It was set on the porch roof and tied into the main roof rafters. Solid as a rock, even it if did lack a guard rail. We used a C-clamp to hold the ladder firmly in position so it didn't slip around. I think it took three or four weekends to finish this job. It was again, one of those jobs that just seemed to take a lot longer than it should. Is this a theme here?
I sure don't want to overlook what Lisa did during some of this time, too. Not only did she help with virtually every one of these jobs, but she also took complete charge of getting the rock retaining wall built, in short order and under budget (such as our budget is). After considering all the bids we got for doing the work, she decided to just hire a bunch of Mike's friends and do it ourselves. She had good helpers who worked hard and in just a week they had built a stone retaining wall averaging three feet high and 120 feet long. 32 tons of rock in all. She worked one weekend, then the afternoons of the week, and finally Saturday to finish up. Perhaps I should put her in charge of the whole project! It looks terrific, and will look even better once she's got her plants in. I'm looking forward to helping her with that part!
Somewhere in all this, we also took advantage of the last of the good weather to finish the siding around the top of the cupola and the exterior painting. While not all the trim is painted still, all the siding is now painted and about 95% of the trim is done. Tigon and Lisa did almost all of the painting. The only thing I did was to paint the rafter tails and do a little touch-up on the cupola. We pushed the weather right up to the very end. We should have been doing this earlier in the summer!
One thing I can write about that didn't hurt much was the driveway concrete. We hired the Jones Brothers to pour a nice slab in front of the garage and up the driveway a bit. In a year or two we'll have them do a parking area by the front door. As usual, they did a nice job at a fair price. Every concrete crew seemed to be booked up this fall, and they were no exception, but, as usual, they came through for me and found time. Roger even came out on Sunday to cut it up!
The rest of this entry could be might as well just say, “Drywall, drywall, drywall, drywall, drywall, drywall, drywall, drywall, drywall, drywall, drywall, drywall, drywall, drywall, drywall, drywall, drywall, drywall.” We're sick of mudding drywall at this point. We've finally gotten some of it done and primed and it looks nice. I think a pro would have done an even better job, but I don't think anybody will ever notice the difference, including me (and I'm getting to be my own harshest critic). What our technique lacks in efficiency and grace, we make up for in persistence and repetition. We keep inspecting and touching up until we get what we want.
I did buy a power drywall sander. I'm sure a pro would tell me that I should need such a tool if only I learned to do the job right in the first place. But I haven't learned yet and in the mean time I've got to keep smoothing out and smoothing out. The best thing about the sander is that it has an effective vacuum hookup, so is makes no dust. Really, no dust! And it's on a five foot pole so I can do a whole room, ceilings and all, without stretching or stooping. It does leave some swirl marks. I haven't quite got the technique down yet. Fortunately, the swirl marks are easy to fill with a quick touch-up coat of mud after priming. Lisa, Mike, and Tigon have all done enough of this job that I don't think any of them will every want to do it again. Recently, Lisa's been a really trooper about getting it done. I need some pushing about now, and she's finally pushing. As of this evening, we've got the cupola, and Mike's bedroom and the upstairs hall ready for painting. Tigon's bedroom is a prime coat way. Our bedroom and the office a about to get their first coat of primer. Once that's done, we'll finish off the stairway and breath a huge sigh of relief before moving to the first floor, which we hope will be easier for a number of reasons.
We've made a lot of progress these last couple of weeks. Everybody has pitched in and made it go really well and I think we all had fun.
First, we've gotten a lot of painting done. Lisa, Tigon, and Mike got Mike's bedroom and closet are all painted, ceilings and walls. Mike chose a steel blue/ grey color with a slightly aqua color for the ceiling. It looks better than I expected. I wouldn't have chosen those colors, but then it's not my room. After the second coat of paint dried, it became apparent that the light or something made the color a little more purple than we expected. It's up to Mike to decide if it is acceptable.
After painting was done, Mike installed the outlets and light switches in his bedroom, so now we can leave that circuit on all the time and actually use switches. Wow!
We selected brown light outlets and switches because we think they we coordinate better with the walnut trim than would the white or the beige. Lisa and Tigon did a survey of everything we needed and made a good list for me to take to the store. As it turns out, brown is not a popular color and our local Lowes doesn't carry much of a selection. So I went to Electric Wholesale, where we're getting our light fixtures, and they were able to satisfy all my needs very reasonably. I walked out with a box full of outlets, switches, and cover places. It's not everything we need, but it is a whole lot of it. I had to order a few special items like dimmers and fan controls.
Tigon and her friend Kim painted Tigon's room. Tigon selected a creamy off-white for the ceiling that will also be used in our bedroom. Her wall color is a sandy, just slightly pinkish, tan. It took two coats to get a good color on her walls. Mike then installed the outlets and switches. He had some problems with one outlet box that stuck out from the wall too much. He was able to surgically remove it and straighten it out without destroying the drywall.
Throughout the second floor, at least, the paint scheme involves wrapping the ceiling color down the wall 3 1/2 inches. At the border between the ceiling color and the wall color we will install picture hanging molding. This creates a nice little faux-crown molding effect. Grandma says that it should have the effect of making the ceilings seem a little lower, which on the second floor will be what we want. I'm not sure if we will do the same on the first floor.
During the evenings last week, Mike and I installed the shower faucet for the kids bathroom. Mike did all the soldering and had no leaks! We mounted the shower head nice and high. We also put in lots of solid blocking to make sure the plumbing and faucets feel solid and don't bounce around. Our current shower doesn't seem to have any blocking and it feels so cheap.
This last weekend, we had a painting party with Grandma and Grandpa out on Saturday to help. With six people (including Tigon) all working together, we got a lot done. Our bedroom got all primed and the ceiling got painted. Lisa and Tigon painted the second floor hallway in a deep brown ceiling and a lighter brown walls. These colors will continue into the office. The choice of colors is supposed to make the hallway look "deeper" and the office seem a little "cave-like." In any case, the colors will look very nice with the brown light fixtures and walnut, and I think it will project a very warm and earthy feeling.
Sunday we primed the office and painted our bedroom walls.
Somewhere in here we finalized our lighting choices. After a lot of agonizing, we chose two different styles of fixtures to use. For the "back side" of the house, meaning the kitchen, back hall, mud-room, and power-room, we selected a less formal style that had a really cool hanging lantern style and nice pendants for use over the kitchen sink. The glass is octagonal.
Here is a link to this style: Murray Feiss
For the other main rooms, we've selected a more geometric shape in a bronze finish. Mostly, these will be wall mounted, with some of the flush and semi-flush mounted ceiling fixtures. We will also use this style in the upstairs bathrooms, but in the brushed nickle finish.
Here is a link to this style: Progress Lighting
We ordered one fixture from each of these two lines to confirm their quality and design details. If they are acceptable, then we'll order the rest of what we need.
We also settled on and ordered the sinks for our bathroom.
Last night, Mike (with a little help, mostly just company) from me, rewired our electric panel so it is much neater, well organized, and easy to maintain. This was an activity that we had planned to do, and now seemed like a good time to do it.
No, I didn't die or drop off the face of the earth or stop working on the house. I just stopped updating the journal. I got tired of doing it and actually working is more fun.
At this point in the project nearly all the drywall and interior painting work is done. The area around the first floor stairs still needs final mudding and painting as does the basement stairway. I don't I wrote about this earlier, but I took a couple of weeks off from work to fast-forward the drywall work. Lisa and Tigon put on a push get the painting done. All that work really made the place look more finished.
It is a lot of work for us armatures to make a really first class smooth finish on drywall. Lisa keeps spotting defects and fixing them, but she now seems to have reached the end of it. There are defects yet to fix but I don't think we've spotted any new ones in a while.
Once the main drywall push was done, I could start working on trim. This is the work that I've been looking forward too since starting the project, and it has turned out to be as challenging and enjoyable as I had hoped. I am also very pleased with the results so far.
The order of trim installation is this: windows, doors, picture rail, baseboards (basically top-down).
We wanted to have the wood in our windows match the walnut wood we are using for all the other trim in the house. Unfortunately, walnut windows were (a) out of our price range and (b) we heard from one source that walnut is not a good choice for window sashes. After a lot of research, we found that virtually all quality windows have the same energy efficiency (comparing like-for-like features). So, we opted to by a reasonably priced Pella window that is made of clear pine (as are virtually all windows). My plan was to then encase the pine jambs inside a layer of walnut, creating a pine window in a walnut frame. We will then paint the window sashes themselves a dark brown to match the outer sash color.
There are pictures of this process at here and here.
For each window there are eleven pieces of wood involved: sill, apron, three jamb liners, three casings, and three back bands.
This whole process went really well. It took a long time because I was starting from rough-sawn lumber and making each piece myself and there are a lot of windows in the house, but I everything fit well and I didn't have to perform any unnatural acts to make things fit. Based on what I've read about trim work, I'd say we did as good a job of framing as any professional crew would have done and probably a bit better (in terms of plumb and square).
One of the special challenges was dealing with multiple window units. These needed casing that would span from one jamb to the adjacent jamb. They also involved extra wide and straight casing pieces and presented the opportunity to select some really nice pieces of wood to showcase in these locations. The observation area window, with three windows units, was the biggest challenge. The sill is 11 feet long and is a wonderful piece of wood.
The door jambs are actually a little simpler than the windows, though larger. A door jamb consists of 15 pieces of wood for a regular door and 16 for a door with a transom. There are three jamb pieces, six casing pieces (three on each side of the door), and six back band pieces.
The jambs are 3/4" thick stock that has to be straight along its edge. A certain amount of bow can be tolerated since shims are used between the jamb and the stud to plumb the jamb and the shims can also be used to straighten the bow in the jamb. I made my jambs 4 5/8" wide and beveled the edges about 2.5 degrees back toward the wall to ensure a tight fit with the casing. The regular jambs have a 3/4" dado at the top for the top jamb and the transom jambs have two dadoes, one at the top and one between the transom area and the door area. The second dado is 1 1/2" wide to accommodate a double thickness of wood for a more solid look and greater strength.
My new dado blade worked very nicely, cutting clean dado with a minimum of effort. The 6 tooth chippers make for a smooth bottom.
The jambs also need to have mortises cut into them to receive the hinges. I cut the mortises using my plunge router, a guide bushing, a straight bit, and a shop-made mortising jig. The jig looks like a set of teeth, but it is really the gaps between the teeth that are of interest. The gaps are just the right width to cut a mortise that neatly fits the hinge and the right depth to position the hinge correctly for the thickness of our doors. I was able to make one jig that handled both the three hinge doors and the heavier four hinge doors. I will use the same jig to cut the mortises in the doors so the hinges should line up perfectly. I want to use square corner hinges for their more traditional look (as opposed to the modern rounded corner), so I had to chisel out the rounded corner left by the router bit.
For the transom jambs I also had to route mortises for the transom hinges. This was the same operation as for the door hinges but required a different jig. I also mounted the transom hinges on the jambs so I wouldn't have to do it off a ladder when the time comes.
I assembled the pieces just before installing each door by gluing and nailing the two side jambs to the top jamb (or the transom jamb). I did make a mistake once and put the transom jamb in with the hinges on the wrong side, but caught it before I installed the jamb so I was able to fix it.
Installing the door jambs went much better than I had anticipated. I was worried about how well we'd framed the rough openings. Were they square enough? Were they plumb enough? I need not have worried. I had very little trouble on that score. On the first half dozen jambs I checked to make sure that both left and right sides were in the same plane by making an X of string across the opening and checking to make sure the strings just barely touched. They all were just about perfect, so I stopped checking each one and learned to trust my level.
I'm now in the process of making the casings for the doors and hope to install them this weekend.
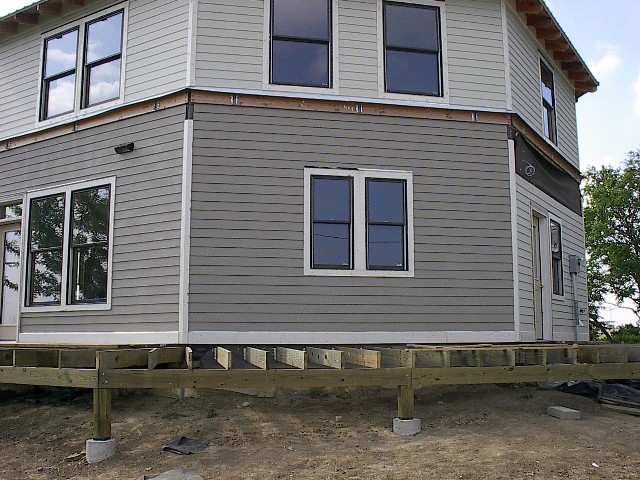
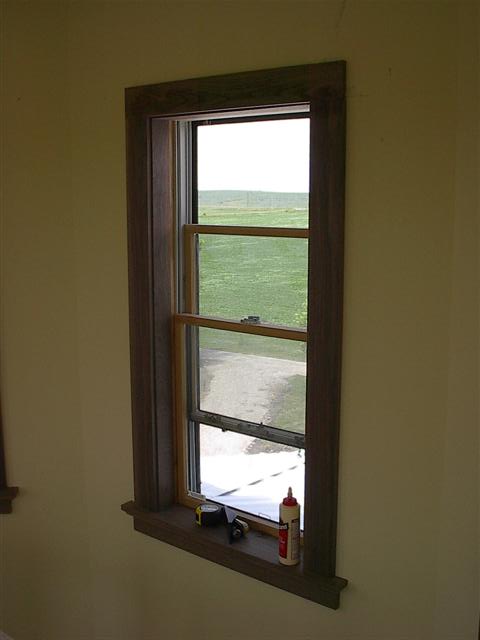
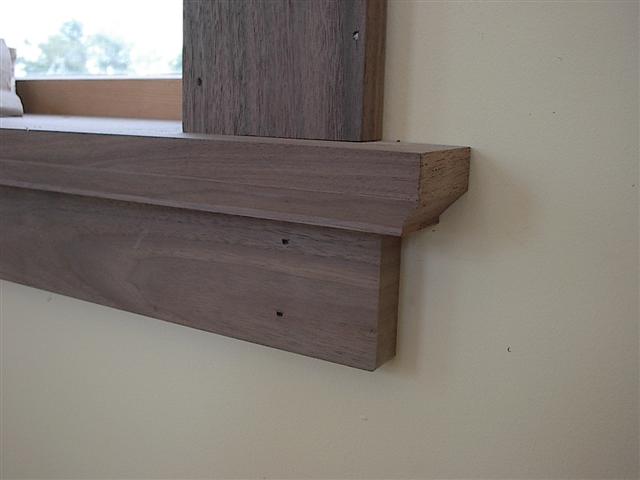